
 Pin it
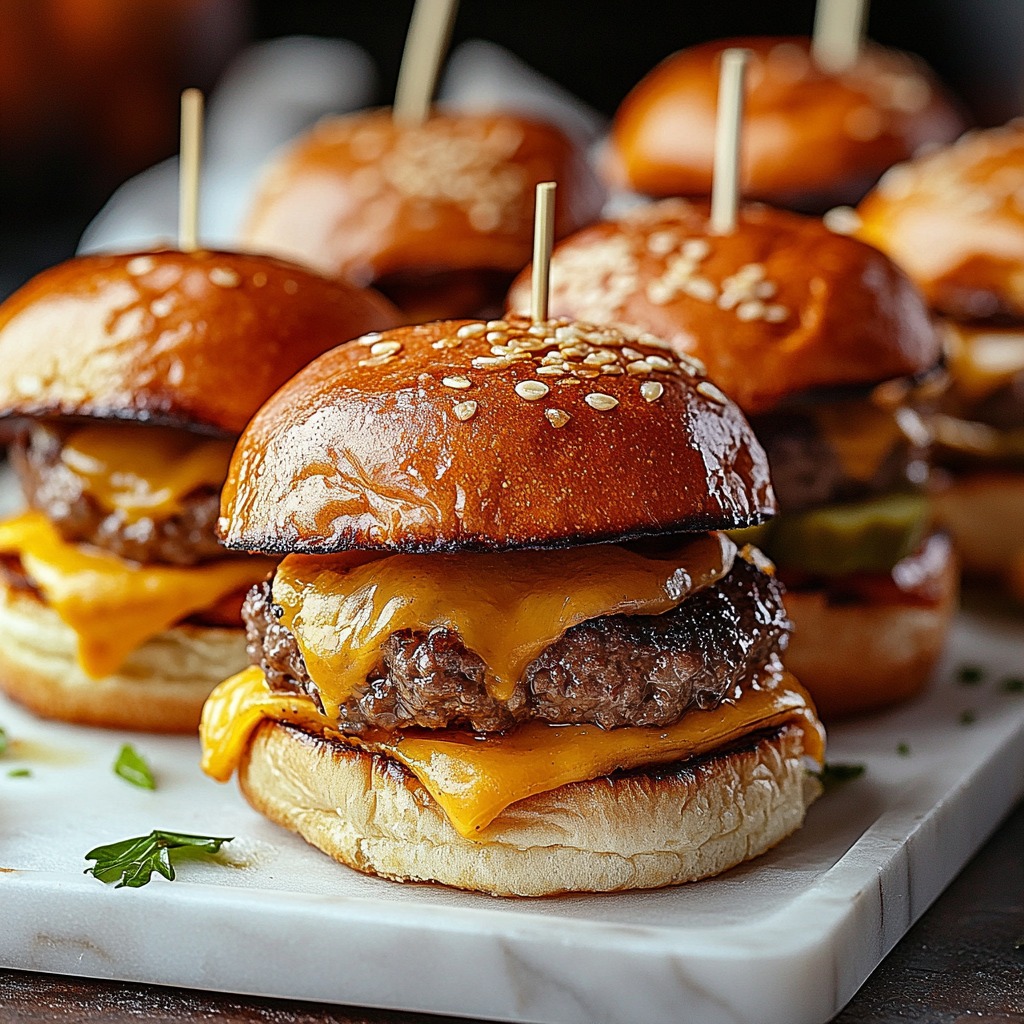
Take a bite of these incredibly succulent mini burgers featuring gooey cheese blended with a unique sauce, all nestled in a fluffy, lightly browned bun. These Cheeseburger Sliders aren't just snacks - they're a show-stopping hit that transforms any event into something special. Through countless attempts at getting this dish right, I've discovered that success comes down to the small things: the correct fat content in your meat and that knockout sauce everyone will beg you to share.
At my kid's basketball team party last week, I brought out a hot tray of these sliders and watched their eyes light up. They cleaned the plate in minutes and came looking for more. What was my trick? Taking care with meat seasoning and getting that cheese melted just perfectly.
Essential Ingredients
- Ground beef (80/20 blend): This mix creates the ideal balance between taste and moisture. Don't go for leaner meat - it won't turn out the same
- Hawaiian rolls: The hint of sweetness works amazingly with the hearty burger flavors. I've sampled many alternatives but always end up using these
- Sharp cheddar cheese: It goes gooey beautifully with just the right zing. Store-bought slices work fine, but hand-grated makes for an even better melt
- Fresh dill pickles: They add snap and tanginess that balances the richness. I chop them tiny so they spread evenly
- The special sauce ingredients (mayo, ketchup, mustard): Combined, they make that unmistakable flavor you'd expect from your favorite burger spot
Step-by-Step Cooking Guide
- Prepare the Meat:
- Mix ground beef with spices using a light touch. Don't mix too much or you'll end up with tough patties. Shape into 12 same-sized balls. Flatten each into a 2-inch round with a small depression in the middle.
- Cook the Patties:
- Warm skillet on medium-high. Cook patties in small groups, giving them space. Sear 3-4 minutes each side for medium doneness. Put cheese on top during the final minute of cooking.
- Prepare the Buns:
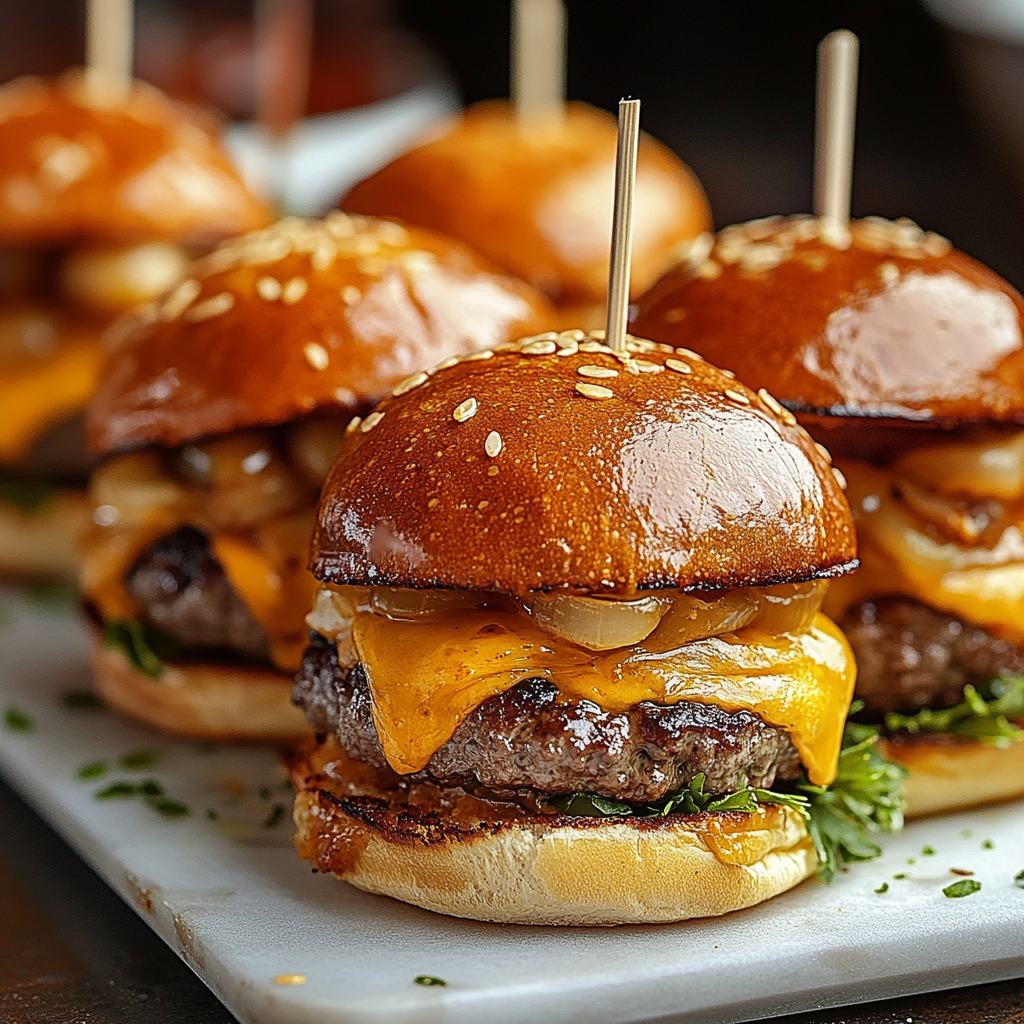
- Cut rolls horizontally, keeping them attached. Combine mayo, ketchup, and mustard for your special sauce. Coat both halves of buns with sauce. Add extra cheese on bottom halves.
- Assembly Process:
- Set hot patties on bottom buns. Sprinkle with diced pickles and any extra goodies. Place top buns over everything. Push down slightly to help flavors mix.
- Final Baking:
- Cover loosely with foil. Heat at 375°F for 8-10 minutes. Take off foil for final 2 minutes to make tops crunchy.
 Pin it
Nailing the Perfect Patty Size
Getting those patties just right took me several attempts to figure out. I found that around 1.3 ounces of beef per slider creates the best match with the buns. A handy tip I picked up when I first started making these was to form them a bit wider than the buns because they'll shrink while cooking. Now each slider has the right amount of meat in every bite.
Why Heat Management Is Key
My cooking changed completely when I started using my meat thermometer. Shooting for 160°F keeps everything safe but still juicy. I've learned to pull them off the heat at 155°F and let them sit a minute - the remaining heat finishes cooking them perfectly.
How to Stack Your Ingredients
Just like building a mini tower, how you stack everything really counts. I start by putting cheese on the bottom bun (it stops the bun getting soggy), followed by the burger, more cheese, pickles, and sauce. This way, you get all the flavors and textures in each mouthful.
Prep Ahead for Easy Cooking
These sliders are great for parties because you can get so much done beforehand. I often shape the patties early in the day, mix up the sauce, and chop all toppings, keeping everything in the fridge separately. This makes putting it all together super quick when company shows up.
Feeding A Bigger Group
When I'm cooking for lots of people, I've found it's best to work with 24 sliders at once. Any more gets tricky to cook evenly and assemble well. Setting up your workspace with everything you need close by makes the whole process much more fun and less stressful.
Storing In The Freezer
I also found out these taste great after being frozen when they're fully cooked. I wrap each one in foil by itself, then put them all in a freezer bag. They heat up wonderfully in about 20 minutes in a 350°F oven, which makes them perfect for busy weeknights when you don't have time to cook.
 Pin it
These cheeseburger sliders have become my favorite party dish, bringing joy and creating happy moments at so many gatherings. They show that little foods can pack big flavor. Whether you're serving hungry kids after sports or hosting friends for dinner, these mini burgers never let you down. The mix of juicy meat, melted cheese, and that knockout sauce creates tiny burgers that taste like they're from a fancy burger joint.
Frequently Asked Questions
- → Can I prep the patties early?
- Sure thing! Cook them ahead, up to a day, and rewarm when putting everything together.
- → How do I keep them hot?
- Wrap them in foil after baking to keep the warmth in.
- → Is freezing these a good idea?
- Freeze the cooked meat, but build the sliders fresh when you serve them.
- → What toppings can I try?
- Go for crispy bacon, sweet onions, or swap cheddar for any favorite cheese.
- → Can I cook these on a barbecue?
- Absolutely! Grill the patties and lightly toast the buns on the grates.