
 Pin it
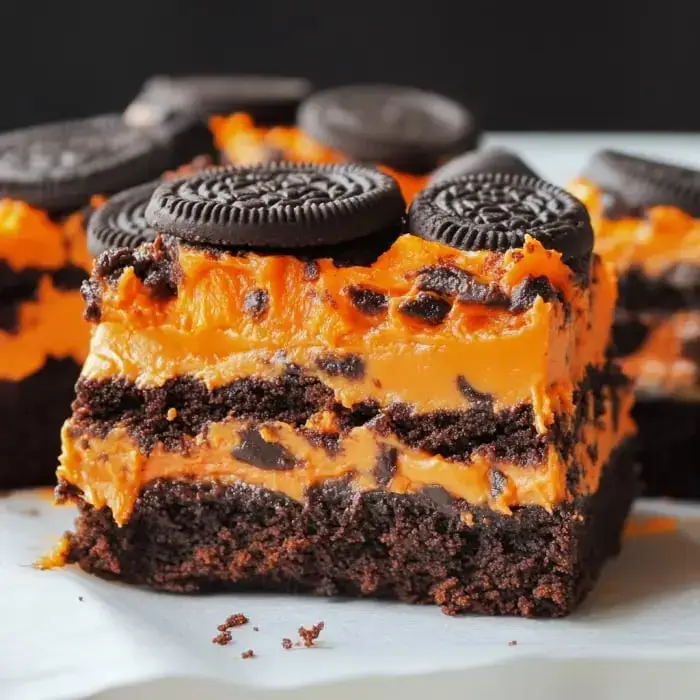
Halloween Oreo Brownies come packed with chocolate goodness and a splash of bright color. You’ve got layers with holiday-themed Oreos, a bold orange middle, and a thick milk chocolate topping to finish it off. These brownies are perfect if you’re throwing a spooky get-together or just want a special fall treat. The mix of gooey chocolate, colorful frosting, and cookie crunch will stand out every time. Check out what you’ll need to whip them up.
INGREDIENTS
- Orange food coloring gel: Brings a pop of festive Halloween color to your frosting.
- 1 can of White or Vanilla frosting: This is what you'll tint orange for the bright layer in the middle.
- 1 can of Milk chocolate frosting: Spread this rich layer over the top of your brownies.
- 1 Package of Halloween Oreos (orange filling): Adds crunch and a bold look to every bite.
- 1/3 cup milk: Makes the batter smooth and easy to pour.
- 1/3 cup oil: Keeps things soft and moist after baking.
- 2 eggs: These help everything hold together and make your brownies richer.
- 1 Brownie Mix: Grab your favorite box—this is the chocolatey base for all the layers.
INSTRUCTIONS
- Step 8:
- Slice brownies into 3x2 inch pieces and dig in! Each bite hits that gooey, fudgy sweet spot.
- Step 7:
- Take brownies from the fridge and layer the milk chocolate frosting right on top. Sprinkle crumbled Oreos for a fun finish.
- Step 6:
- Chill the frosted brownies in the fridge for at least 30 minutes so the orange layer sets up nicely.
- Step 5:
- Mix your white (or vanilla) frosting with the orange filling from 10 Oreos in a bowl. Squirt in a teaspoon of orange gel and stir until it’s super vibrant.
- Step 4:
- Bake those brownies for about 25–30 minutes. Stick in a toothpick—if it’s clean, they’re ready! Let them cool all the way in the pan.
- Step 3:
- Smooth your brownie batter into the lined pan, then cover the top edge-to-edge with Oreos.
- Step 2:
- Toss together your brownie mix, eggs, oil, and milk in the mixer bowl. Blend on medium using the whisk attachment until it’s lump-free.
- Step 1:
- Set your oven to 350°F and pop parchment paper in a 9x9 pan so nothing sticks later.
Serving and Storage Tips
- Want your brownies to hold those colorful layers? Stick 'em in the fridge—they’ll slice cleaner when cold. But room temp works if you like a softer bite.
- Cutting them small and setting them out on a themed platter makes them a hit at parties.
- Wrap up leftovers tight and stash in the fridge for 3 days. Or freeze for a couple months—just let them sit in the fridge overnight before you eat again.
Tips from Well-Known Chefs
- Duff Goldman likes lining the pan with parchment, so you won’t wrestle with stuck brownies later.
- Christina Tosi suggests chilling them for a bit—makes the frosted layers nice and firm and the slices super clean.
VARIATIONS
- Craving peanut butter? Go with peanut butter Oreos or spread some peanut butter between layers before you bake.
- Make 'em even more decadent—toss in handfuls of chocolate chips with the batter.
- Color switch! Use red and green for a holiday treat or play with colors for any party theme.