
 Pin it
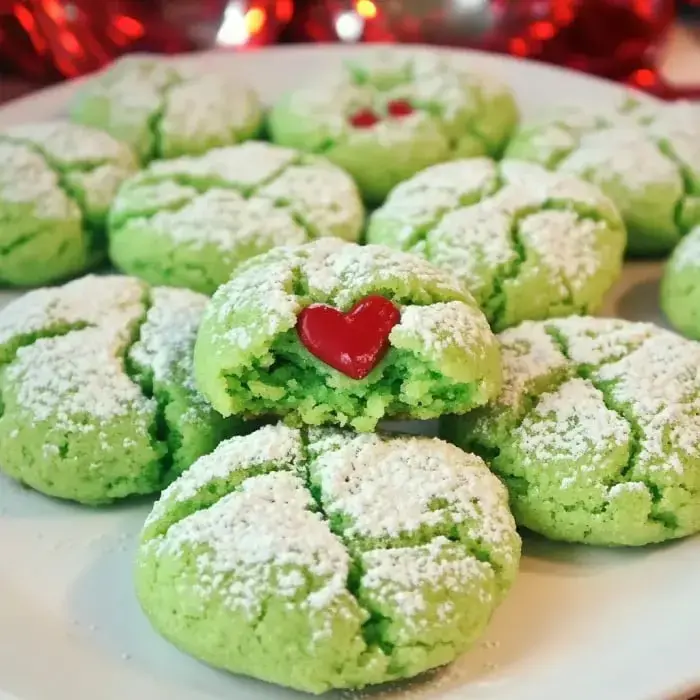
Whip up some playful Grinch crinkle cookies for the holidays. They're bright green, soft, and each one has a cute red heart on top—just like your favorite Christmas tale. They’re a breeze to make, little ones go wild for them, and they’re awesome for festive get-togethers or cozy movie time.
Reasons You’ll Love These Cookies
They’re super eye-catching and taste awesome. Kids freak out over the cool green color and that tiny heart. Best for holiday parties or chilling while watching The Grinch. They’re pretty quick to throw together, and folks always ask how you did it.
Stuff You’ll Need
- Extra Sugar: For rolling the dough balls
- Red Hearts: Little heart-shaped candies
- Green Color: Just a few drops
- Peppermint: Half a spoon
- Vanilla: One spoon
- Butter: One stick, let it get soft
- Eggs: Two big ones
- Sugar: One cup plain white
- Salt: Just a pinch
- Baking Powder: Two spoons
- Flour: Two and a half cups
Simple Grinchy Instructions
- Let cool:
- Give them two minutes on the pan, then pop onto a rack so they set up more.
- Bake them:
- Pop in the oven for 8 minutes. You want the edges lightly golden.
- Add hearts:
- Press a little red heart on every cookie top.
- Put on pan:
- Space dough balls on your sheet and give them a gentle flatten.
- Roll balls:
- Shape into balls and coat them in sugar.
- Make green:
- Add drops of food color and mix till that Grinchy shade shows up.
- Make dough:
- Slowly combine dry with wet. Stop once blended.
- Add wet stuff:
- Drop in eggs, peppermint, and vanilla. Stir until smooth.
- Beat butter:
- Whip up the soft butter and sugar till it looks fluffy—takes about 3 minutes.
- Mix dry stuff:
- In a bowl, stir salt, baking powder, and flour all together.
- Heat oven:
- Bump oven to 375°. Line your cookie sheet with parchment paper.
 Pin it
What Makes These Cookies Fun
They’re not just regular cookies—they’re Grinchy treats. Super playful on any Christmas dessert table. Minty-sweet, too. Kids always want to help make them and stick the hearts on top.
Why These Ingredients Work
Real butter brings the rich flavor. Peppermint’s what gives that classic Christmas vibe—don’t skip it. Make sure your green is nice and bright! When you add the heart candies, press them in while cookies are still a bit warm so they stay put.
Change Things Up
Need the fastest way? Grab cake mix and add green coloring. Big on mint? Toss in another drop. People sometimes roll these in powdered sugar for extra white cracks. You can use whatever candy hearts you like.
Cookie Success Tricks
If you forget the parchment, these guys will stick. Make all your dough balls about the same size so they bake right. Push hearts in just enough so they stay, but not too deep. Keep an eye on the oven, they bake up quick. Let them hang out before moving so they don’t break apart.
How to Store Them
They stay soft in a tight container for five days at room temp. Want to keep them longer? Freeze up to three months. Let them warm up before biting in. Stack with paper in between so hearts won’t stick together. Don’t refrigerate or they’ll go hard.
 Pin it
Frequently Asked Questions
- → Can I prepare the dough early?
Absolutely! You can whip it up 3 days in advance. Just make sure it’s tightly wrapped and kept in the fridge. When you’re ready to bake, let it sit out for about 20 minutes before rolling—it’s easier to handle that way. Some folks like doubling batches—use half now, freeze the rest. For fresher cookies, prep it at night and bake in the morning. Actually, chilled dough holds its shape better and gives you those pretty crackled tops.
- → How can I keep them soft?
Timing is everything! Take them out when the edges are set, but the center still seems a little soft—they’ll keep cooking on the hot tray. Cool them there for about 5 minutes, then move to a rack. Once they’re completely cool, store in an airtight container with a slice of bread—this keeps them soft for a while. If you’re stacking layers, use wax paper. Don’t put away warm cookies, they’ll get soggy! Adding a tiny bit of pudding mix to the dough can also boost softness. Just avoid overbaking—they’ll turn hard if left in too long.
- → Do they freeze well?
They freeze perfectly! Make the dough, shape it into balls, but skip the sugar coating. Place them on a tray to freeze, then toss them into a freezer bag—they’ll stay good for 3 months. When you’re ready to bake, thaw for 30 minutes, coat in sugar, then bake as normal. Want to freeze the baked cookies? Cool them completely first. Freeze flat before putting them in a box with wax paper between layers. Just a heads-up: the red hearts might run when thawing, so it’s better to add them after. Thaw best in the fridge overnight.
- → What fun changes can I make?
Get creative! Add a bit of lemon zest for a fresh pop of flavor. Swap vanilla for peppermint extract—it’s super Christmas-y! Almond extract works too. Want some sparkle? Roll the dough in colored sugar. You can easily change the theme—make them red for Valentine’s Day, orange for Halloween. Try different candies—use stars for New Year’s or eggs at Easter. If you’re swapping extracts, keep the liquid amounts the same. Some folks add white chocolate chips for extra sweetness!
- → Can I make a gluten-free version?
You can! Use a gluten-free baking mix that works one-to-one, like Bob’s Red Mill or King Arthur. If your mix doesn’t have xanthan gum, add about 1/4 teaspoon. Gluten-free flours need a bit more, so add 1-2 extra tablespoons if needed. Let the dough sit for about 30 minutes before rolling—it’ll improve the texture. They might spread more in the oven, so space them apart. Double-check the hearts and food coloring too—they can sometimes sneak in gluten! The texture might feel slightly different, but they’ll still taste great.
Conclusion
Love baking playful goodies? Don’t stop here—try crafting sugar cookies in fun shapes next. Or, fill your house with the warm scent of gingerbread by making cute gingerbread figures.