
 Pin it
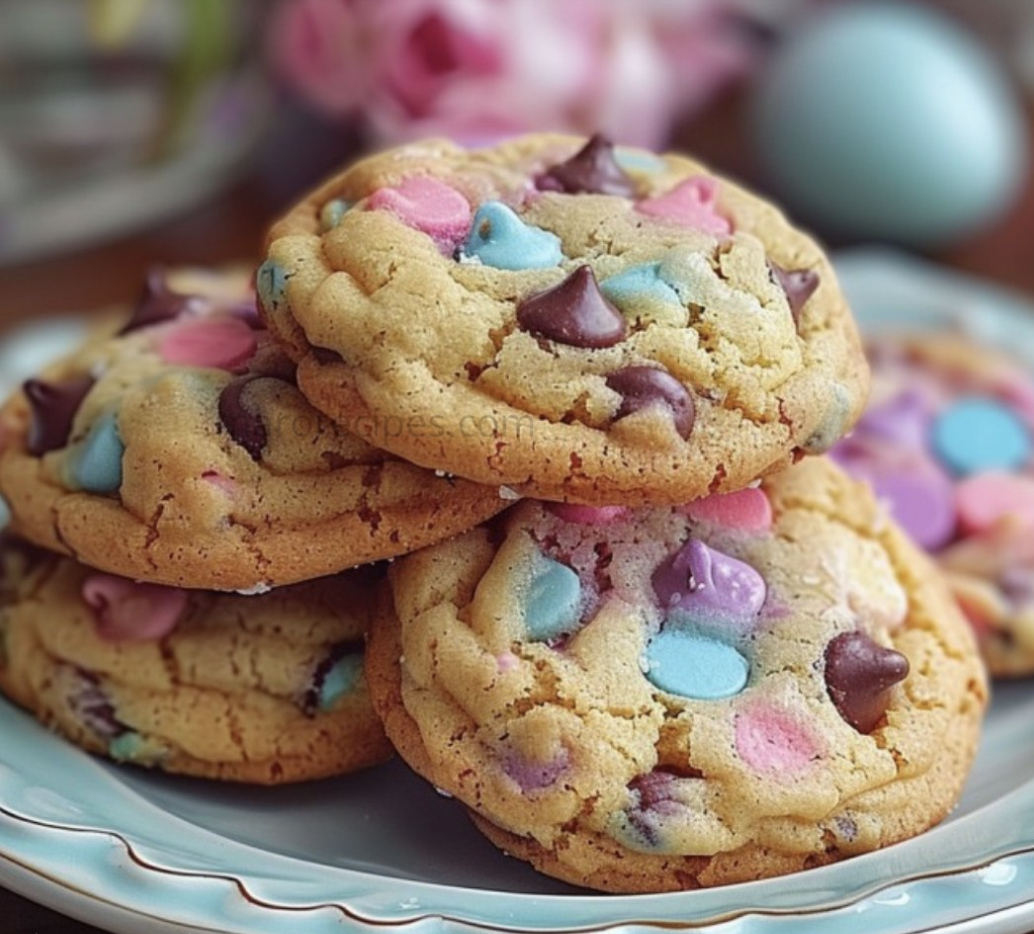
Bring the Easter spirit alive with these fun, swirled chocolate chip treats that mix traditional comfort with springtime pastels. The marbled design adds playful color to your holiday spread, creating a tasty conversation starter that captivates kids and grown-ups alike during your spring celebrations.
I whipped these up for my niece's Easter hunt last spring. The kids couldn't take their eyes off those colorful swirls, and the adults kept sneaking extras when nobody was looking. They've become the must-have treat at all our springtime get-togethers.
Essential Ingredients
- All-purpose flour: Gives these cookies their ideal shape and lets them spread just right
- Baking soda: Helps them puff up nicely for that perfect bite
- Salt: Cuts through sweetness and boosts other flavors
- Unsalted butter: Lets you manage saltiness while adding richness. Make sure it's soft before starting
- Granulated sugar: Works magic for those crunchy edges
- Brown sugar: Adds dampness and hints of caramel flavor
- Large eggs: Hold everything together while adding lightness
- Vanilla extract: Brings warm, homey flavor notes. Go for real stuff if you can
- Gel food coloring: Makes bright spring colors without making the dough runny
- Chocolate chips: Create little melt-in-your-mouth surprises. Pick semisweet for that sweet-bitter balance
Simple Baking Method
- Set Up Kitchen:
- Heat your oven to 350°F and put parchment on your cookie sheets. Getting organized makes everything go smoother. Double-check your butter is truly soft—that's key for good mixing.
- Put Dry Stuff Together:
- Stir flour, baking soda, and salt in a bowl until they're fully mixed. This helps your cookies rise evenly throughout. The whisking also puts a bit of air in the flour for better texture.
- Make Cookie Base:
- Mix the soft butter with both kinds of sugar for a full 3 minutes until it looks lighter and fluffy. This puts air bubbles in your dough so cookies turn out better. Drop in eggs one by one, waiting until each disappears before adding another. Stir in vanilla until everything smells amazing.
- Join Wet And Dry Ingredients:
- Add flour mix to butter mix in three batches, stirring just enough to make dry parts vanish. Don't mix too much or your cookies might come out tough—gentle is better here.
- Add Spring Colors:
- Split dough into four equal chunks. Work one chunk at a time, dropping in a bit of gel color and folding carefully until the color spreads evenly. You want bright but still pastel colors.
- Shape Swirled Cookies:
- Grab bits from each colored dough and press them loosely together into 1.5-inch balls with visible color sections. Put them on your cookie sheet with 2 inches between them. Push a few chocolate chips into the top of each.
- Bake Them Right:
- Cook for exactly 10 minutes if you like soft middles or 12 minutes for firmer cookies. Look for golden edges with softer centers. Let them sit on the hot pan for 5 minutes before moving to a cooling rack.
What makes me smile most when baking these is watching everyone get excited about those colorful swirls. My grandma always told me we first eat with our eyes, and these cookies prove her point every time. There's something really special about making treats that taste good and look amazing too.
Prep Them Early
You can easily make these ahead of time. The dough stays good in the fridge for up to 3 days if you keep it covered. Just let it warm up for about 30 minutes before you start shaping cookies. You can also form the cookie balls and freeze them on a tray, then toss them in a freezer bag for up to two months. When you're ready, bake them straight from the freezer—just add 2 more minutes to your baking time.
Switching Things Up
The swirl method works great with any holiday colors, not just Easter pastels. Try making them with red and green for Christmas parties, orange and black for Halloween fun, or your kid's school colors for graduation. You can swap out chocolate chips for white chocolate, butterscotch, or even peanut butter chips to change the flavor. Want more texture? Toss in 1/2 cup chopped nuts or 1/4 cup sprinkles to your dough before you divide and color it.
Ways To Enjoy Them
These cookies look amazing on any Easter table, especially if you arrange them on a light-colored plate. They go great with fresh berries and a dollop of whipped cream for a complete spring treat. Serve them with coffee or tea at your Easter brunch for something sweet. They also work perfectly tucked into Easter baskets or wrapped in clear bags with name tags as cute place settings for your guests.
Frequently Asked Questions
- → How can I get pastel tones in my cookies?
Split the dough into portions and add pastel gel food coloring to each. Swirl them together for a marbled effect before shaping the cookies.
- → Should I use natural food dyes?
You can! Just remember, natural dyes might give softer tones. Adjust the amount to match your desired colors.
- → Which chocolate chips should I use?
Semisweet chips are great, but white or milk chocolate also works. Pick your favorite for a unique flavor twist.
- → How do I stop the cookies from spreading too much?
Ensure the butter is softened but not melted. If needed, chill the dough for 20-30 minutes to firm it up before baking.
- → Is freezing the dough an option?
Of course! Freeze formed dough balls on a flat tray, then store them in a bag. Bake from frozen, giving them 1-2 extra minutes in the oven.
- → What’s the best way to keep these cookies fresh?
Use an airtight container at room temperature to store them for up to five days. For longer freshness, freeze for up to three months.