
 Pin it
This Thai tea brûlée brings a fun twist to the classic French favorite. You get bold Thai tea flavor mixed into rich creaminess for a treat you won't forget anytime soon.
I found this idea when I was exploring Thailand. Ever since, it’s been the dessert I bring out for special moments. One bite and I’m back on those busy Bangkok streets.
Tasty Ingredients
- 2 cups heavy cream: gives you that signature thick, silky texture you expect
- 1/2 cup milk: lightens up the richness just a touch without making it thin
- 1/2 cup Thai tea mix: use genuine Thai tea, the spicier the better for big flavor
- 4 large egg yolks: hold everything together and add a creamy base
- 1/2 cup sweetened condensed milk: brings a unique caramel-like sweetness that really works with the tea
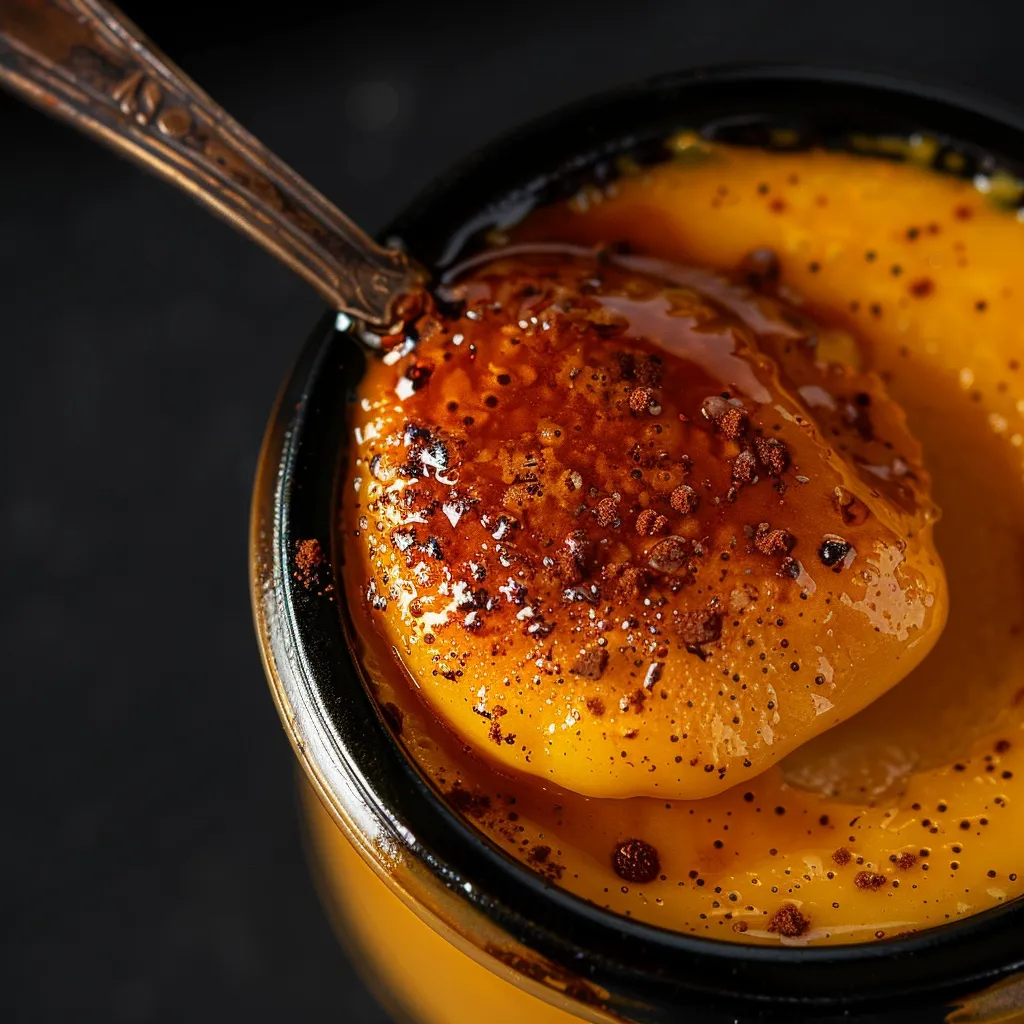
- 2 tablespoons granulated sugar for topping: go with superfine sugar so it melts and crisps up right
Step-by-Step Directions
- Crisp the top:
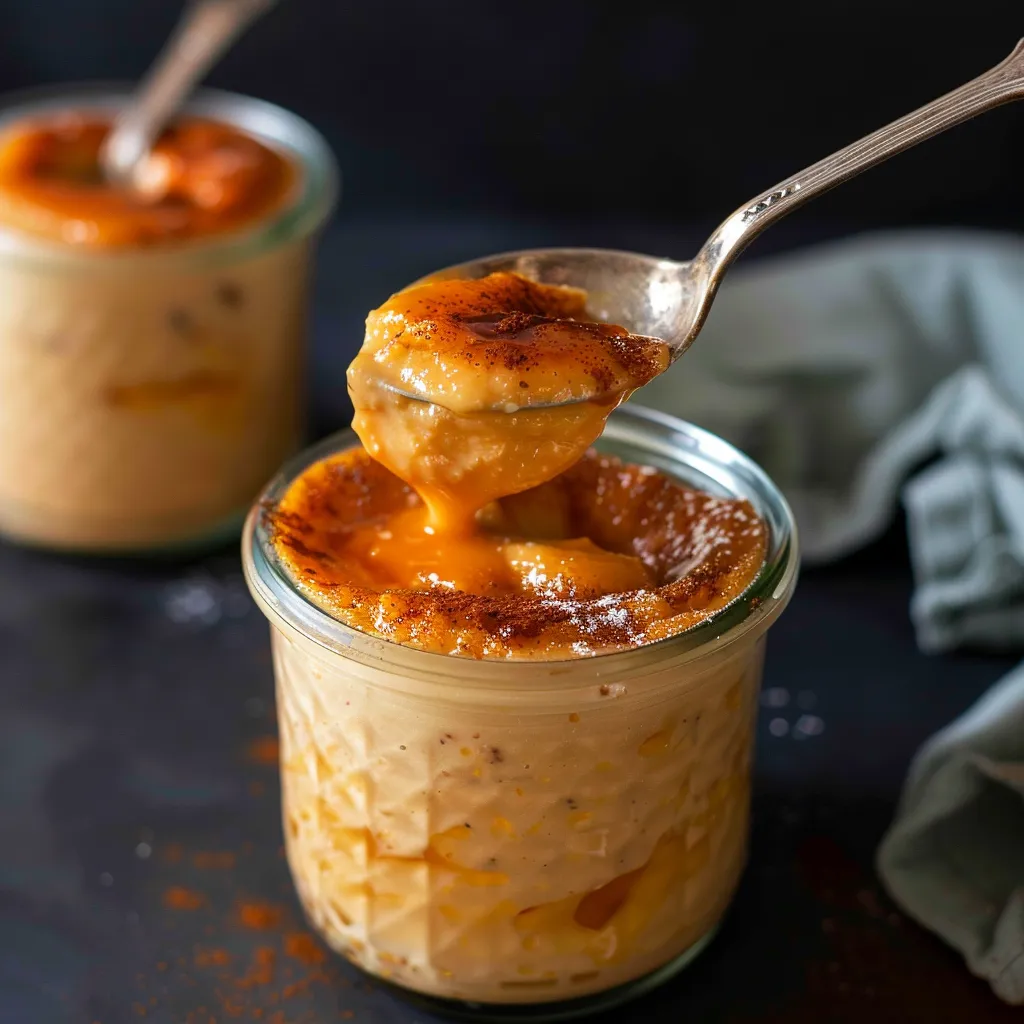
- Once the custards are cold, sprinkle a thin layer of sugar over each. Fire up a kitchen torch and melt the sugar till golden and glassy. Let it set for just a bit to harden.
- Chill out:
- Take them gently out of the hot water and leave on the counter till barely warm. Pop them in the fridge at least 2 hours, or leave for up to 3 days so they really set up.
- Bake in a water bath:
- Pour into three 8-ounce ramekins and set them in a deep dish. Add your hot water so it’s halfway up the sides. Bake 25 to 30 minutes, till the edges hold but the middle still jiggles a bit.
- Make the cream base:
- Whisk the yolks and condensed milk together in a heatproof bowl till it’s smooth and thickish. Little by little, pour in the hot Thai tea cream, whisking so you don’t end up with scrambled eggs.
- Strain it:
- Take a fine mesh strainer or cheesecloth and pour the infused cream through, pressing a bit to pull out all the flavor. Toss the tea leaves and make sure the liquid is perfectly smooth.
- Infuse the tea:
- Put the cream, milk, and Thai tea mix in a saucepan over medium heat. Slowly bring it just to a boil, stirring now and then. When it gets there, remove from heat and let sit five to ten minutes so the tea flavor really shines.
- Get your oven ready:
- Set it to 300°F. You’ll also want to start heating water for your water bath—it should be hot, but not boiling, for gentle cooking.
The Thai tea really makes this stand out. When I first served it to friends, they were blown away by the mix of familiar and fresh flavors. People keep asking for it!
Storing and Serving
Keep your brûlées (before torching) in the fridge, covered tight, for up to three days. Don’t add the caramel sugar until right before eating so you keep that awesome crackly contrast. Once you torch them, try to eat within the hour for the best texture.
 Pin it
Tasty Variations
Play around with different teas—try matcha, chai, or Earl Grey for new flavors. For something special, drop in a pandan leaf or add a little fresh ginger while steeping for a warming kick.
Perfect Match
Pair this Thai tea brûlée with juicy fruits like mango or lychee—they really make the flavors pop. A little sprinkle of cardamom on your fruit makes it sing. Want to go all out? Have it with iced Thai tea, too.
Pro Tips
- Always drizzle the hot cream into the yolks bit by bit while whisking to avoid scrambled eggs.
- For a great sugar crust, do two thin layers of sugar, torching between each for that pro crackle.
- You want the finished dessert to wiggle just a little in the middle; overbaking will give you a less silky mouthfeel.
Frequently Asked Questions
- → Can I use a different tea instead of Thai Tea?
Absolutely! Teas like chai or matcha can work, creating their own unique twist to the dessert.
- → How do I keep the egg yolks from scrambling?
Slowly pour the warm Thai Tea mixture while whisking without stopping. This tempers the eggs so they don’t cook too quickly.
- → Can I make this dessert ahead of time?
Sure thing! Prepare it up to three days ahead, but only caramelize the top just before serving for the best crunch.
- → What if I don’t have a torch for caramelizing?
Use the oven's broiler at a high temperature (450°F / 230°C). Place the dessert close to the heat and watch carefully to avoid burning the sugar.
- → Why is the center of my cream still runny?
Make sure you cook it for the right amount of time. The edges should set while the middle stays slightly jiggly. Cooling it will help it firm up completely.