
 Pin it
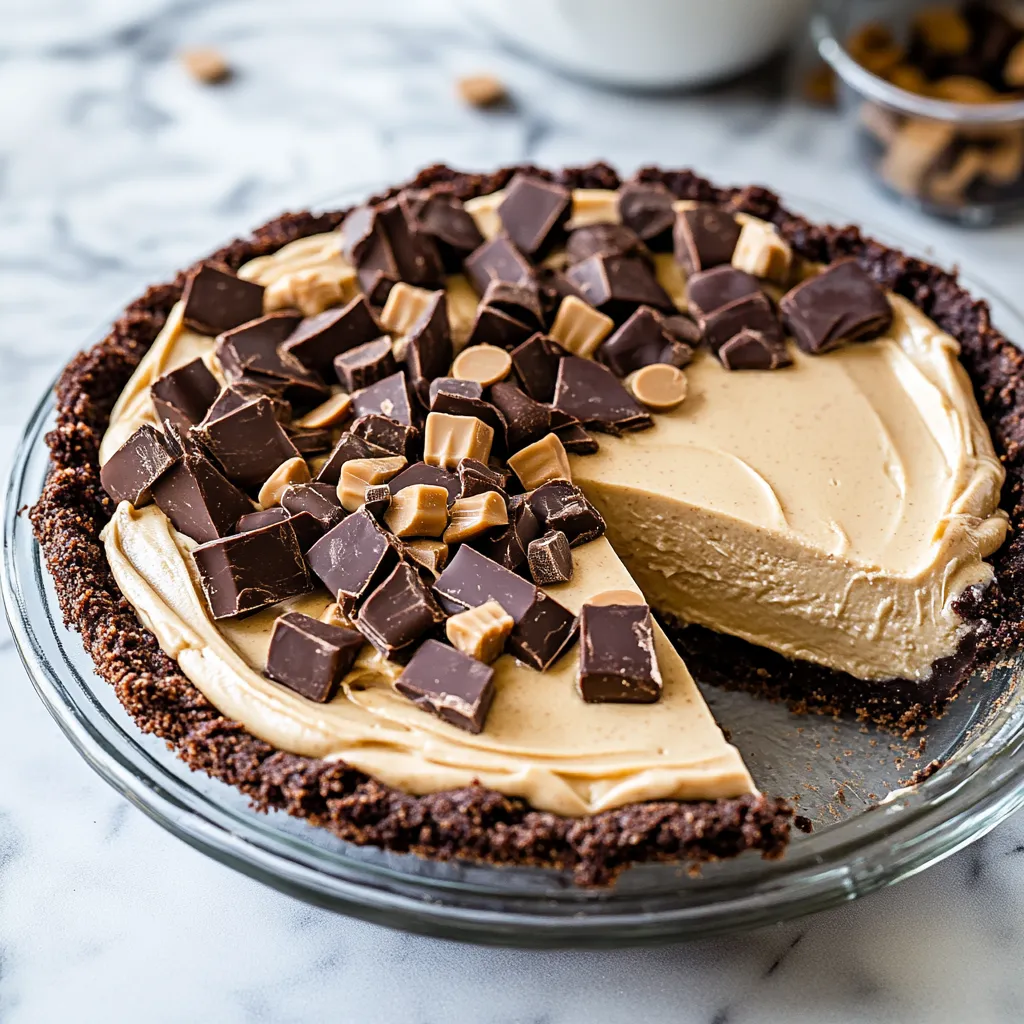
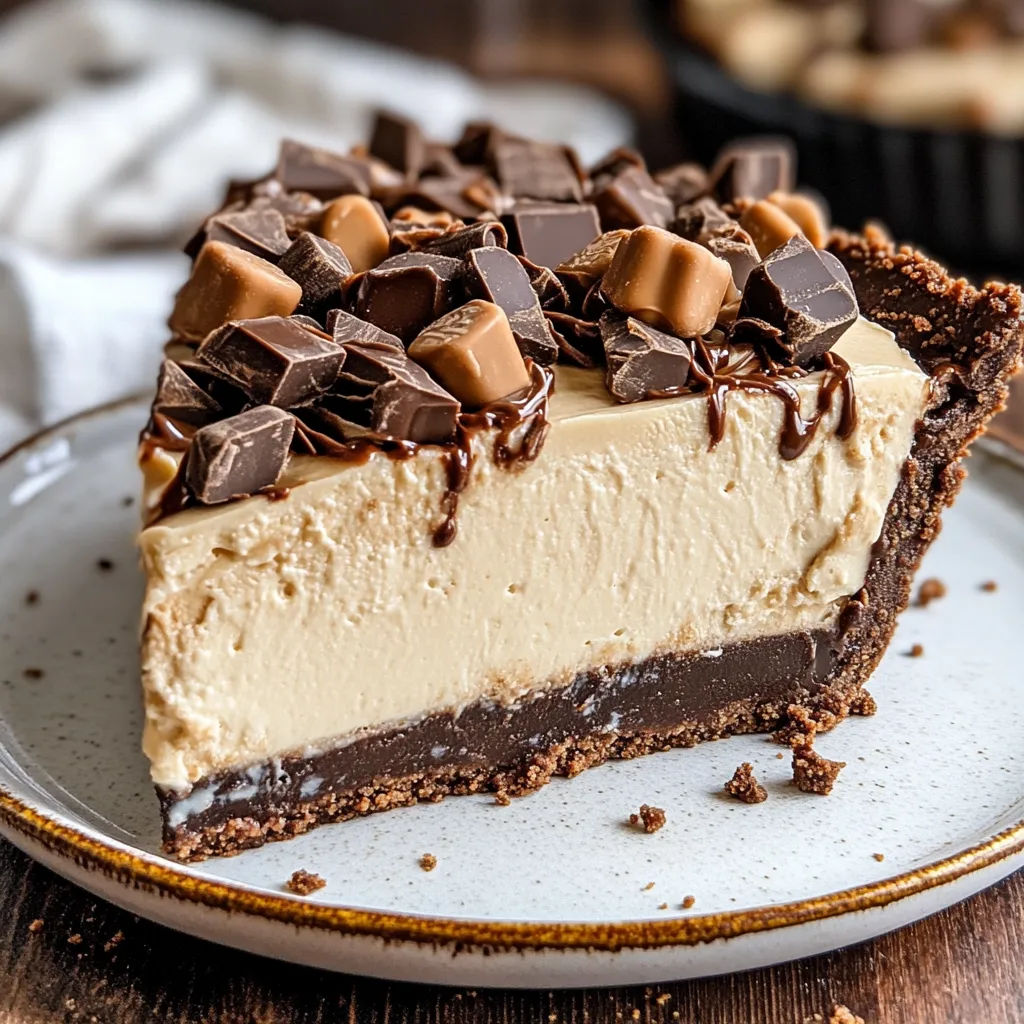
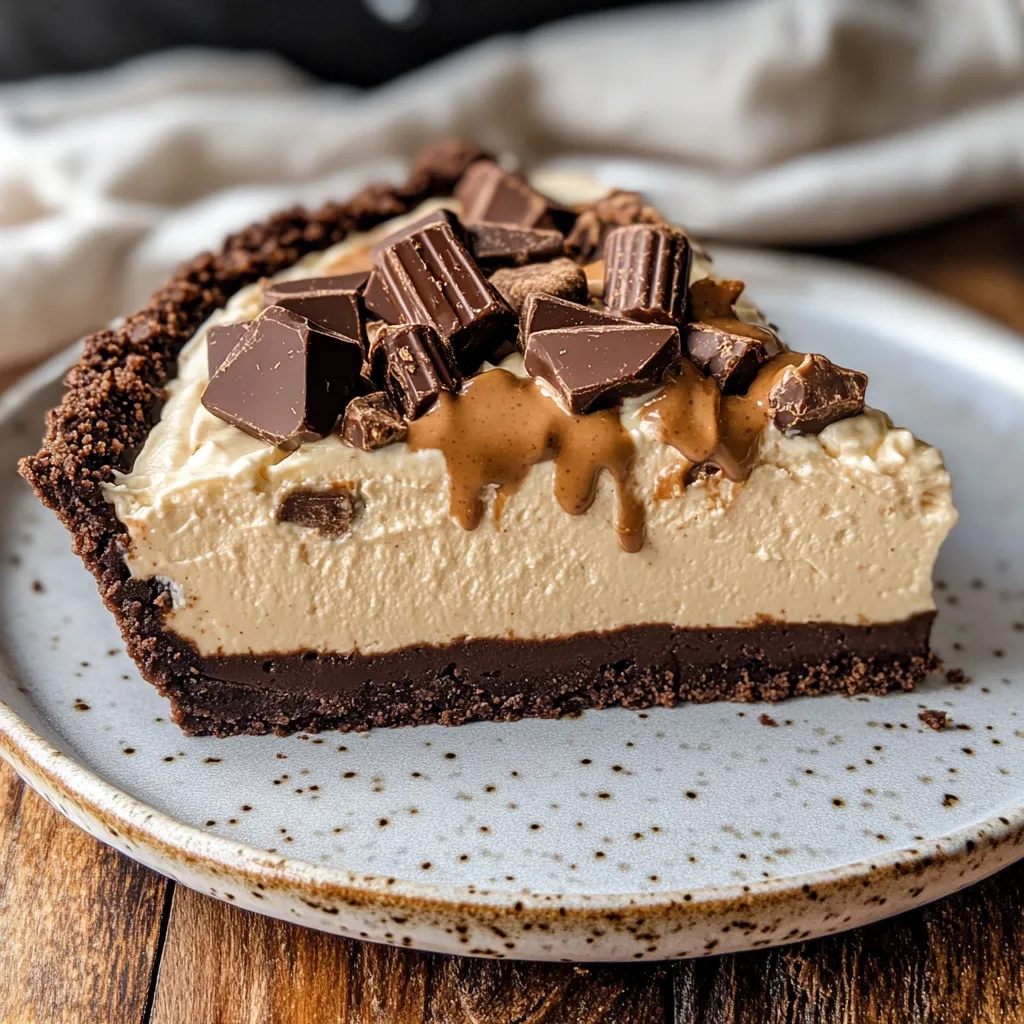
A velvety peanut butter pie with no need for baking makes this treat popular all year long. The smooth filling paired with a crisp Oreo base builds an amazing mix of textures that takes me back to those classic peanut butter cups, just fancier and more grown-up.
When I first whipped this up for my daughter's party, it was gone in no time so I started making two pies at once. These days it's the dessert everyone asks for at family get-togethers, especially during hot summer cookouts when nobody wants to heat up the house.
Key Components
- Oreos: Standard ones work best - they break down into just the right crust texture
- Cream Cheese: Use the full-fat kind at room temp for the creamiest results
- Peanut Butter: Stick with mainstream types like Skippy or Jif for better consistency
- Heavy Cream: Keep it super cold until you're ready to whip it
- Powdered Sugar: Blends in completely without any gritty feel
- Vanilla Extract: Brings out the peanut butter taste even more
 Pin it
Step-by-Step Approach
- Step 1:
- Let your cream cheese sit out for about 2 hours until really soft - even slightly cool cream cheese will create bumps.
- Step 2:
- When breaking down the Oreos, stop pulsing once you've got fine crumbs but before they turn powdery.
- Step 3:
- Add butter to your crumbs bit by bit, stopping when it feels like damp sand.
- Step 4:
- Push the crust down firmly using a measuring cup bottom, focusing on the edge where bottom meets sides.
- Step 5:
- Let the crust get cold and hard - this helps it stay together when you add the filling.
- Step 6:
- Whip your cream in a cold bowl until it forms soft peaks, then mix in sugar and keep going until stiff.
- Step 7:
- Mix the cream cheese by itself first until totally smooth before you add anything else.
- Step 8:
- Mix peanut butter into cream cheese slowly, scraping the sides often.
- Step 9:
- Gently fold whipped cream in with up-and-down motions to keep it fluffy.
- Step 10:
- Chill until fully set for neat slices.
We found out that slightly frozen pieces taste fantastic when it's hot outside. My grandson calls it his "peanut butter ice cream pie" and always wants it for his birthday.
Stunning Party Option
Making this pie in advance takes the rush out of hosting. The filling stays firm for hours, and the crust keeps its nice crunch.
Weather-Based Tweaks
In summer, try the frozen version with chocolate sauce drizzled on top, while colder months pair well with warm butterscotch and a sprinkle of nuts.
 Pin it
Do-Ahead Wonder
This pie actually tastes better after spending a day in the fridge as all the flavors blend together and it firms up just right.
This no-bake peanut butter pie has turned into my go-to dessert, the one everyone expects me to show up with. It's easy to make and never fails, perfect for any gathering, while its rich, creamy goodness guarantees clean plates and happy faces every single time.
Frequently Asked Questions
- → Can this be prepared in advance?
- Yep, you can prep up to 3 days ahead and keep it chilled, or freeze for a month.
- → Why use softened cream cheese?
- Softened cream cheese mixes smoothly and avoids any lumps in the filling.
- → Can I use crunchy peanut butter here?
- Stick with creamy peanut butter for the best, smoothest filling.
- → What works instead of chocolate graham crackers?
- You can swap with crushed Oreos or Chocolate Teddy Grahams.
- → What if I don't want peanut butter?
- Try almond butter instead and refer to the substitution notes.