
 Pin it
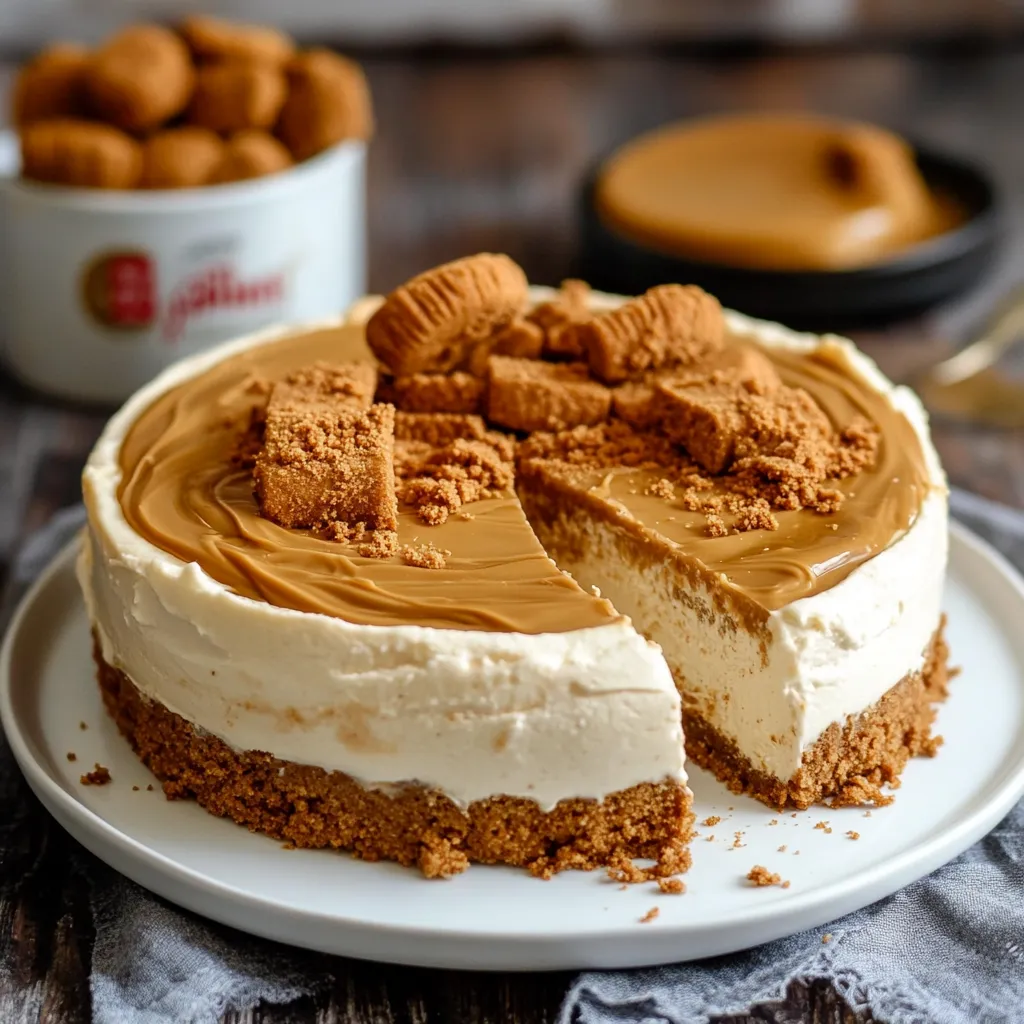
This creamy Biscoff cheesecake has been my go-to dessert for countless family gatherings and dinner parties. When you blend the caramel-like taste of Biscoff cookies with smooth cheesecake, you get something truly amazing. I've tweaked this recipe many times to get the texture and flavor balance just right.
I brought this to my neighbor's birthday last weekend. I'll never forget how everyone's eyes lit up with their first taste. Their plates were empty within minutes, and I left with three people asking me for the recipe.
Key Ingredients Unpacked
- Biscoff Cookies: They're the main attraction here. Get packages that don't feel broken - damaged cookies might not be fresh
- Full-Fat Cream Cheese: Don't try to save calories here. Good quality cream cheese forms the backbone of our dessert
- Double Cream: It should be fresh and cold. A gentle shake of the carton will tell you if it's thick enough
- Biscoff Spread: This magic ingredient deepens that wonderful caramel flavor
- Unsalted Butter: Gives our base the perfect structure
- Optional Toppings: Extra cookies for decoration, fresh berries for a nice color contrast
Easy Preparation Guide
- Getting Your Tools Ready:
- Grab a deep 9-inch springform pan. Put parchment paper on the bottom, letting it go slightly up the sides. Put a bit of butter on the pan sides.
- Making That Delicious Base:
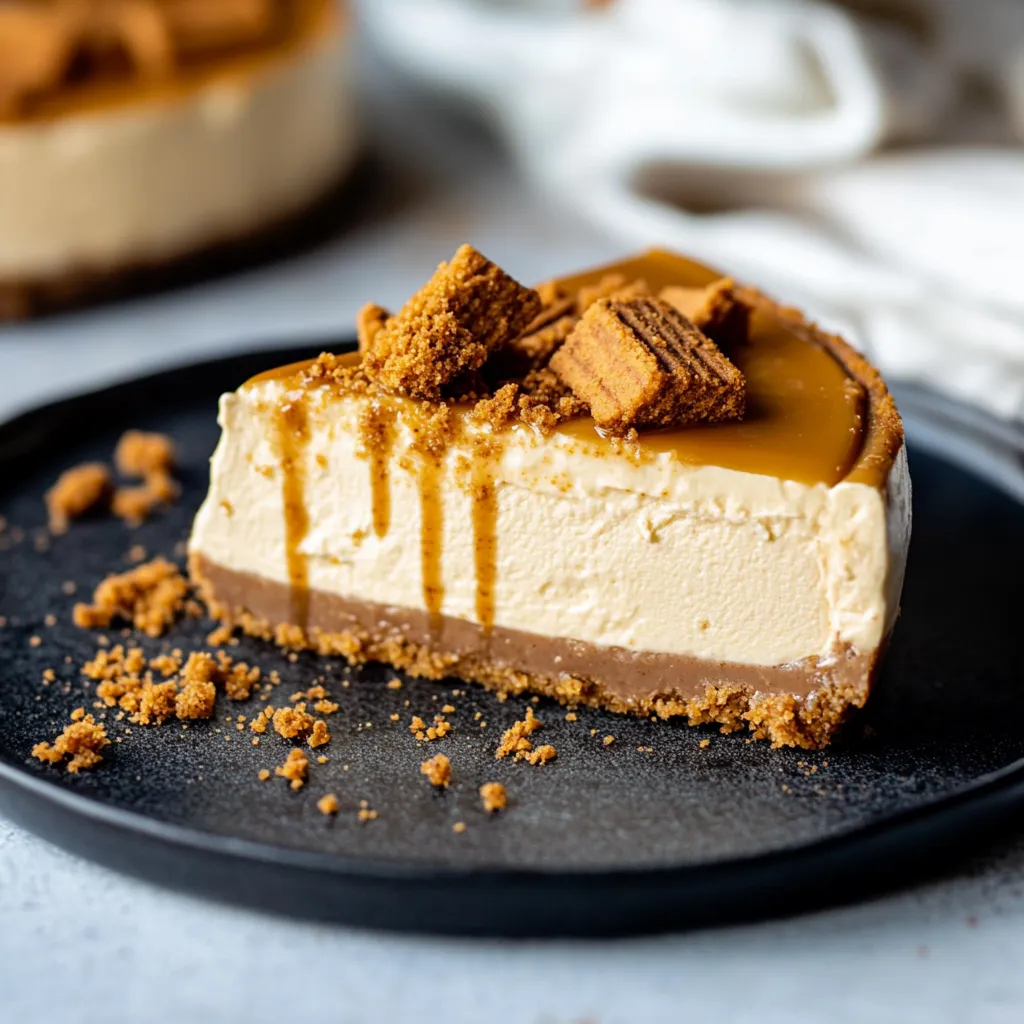
- Turn your Biscoff cookies into fine crumbs with a food processor or rolling pin. Melt some butter and mix it with the crumbs until they're all coated. Press this into your pan and stick it in the fridge.
- Creating The Filling:
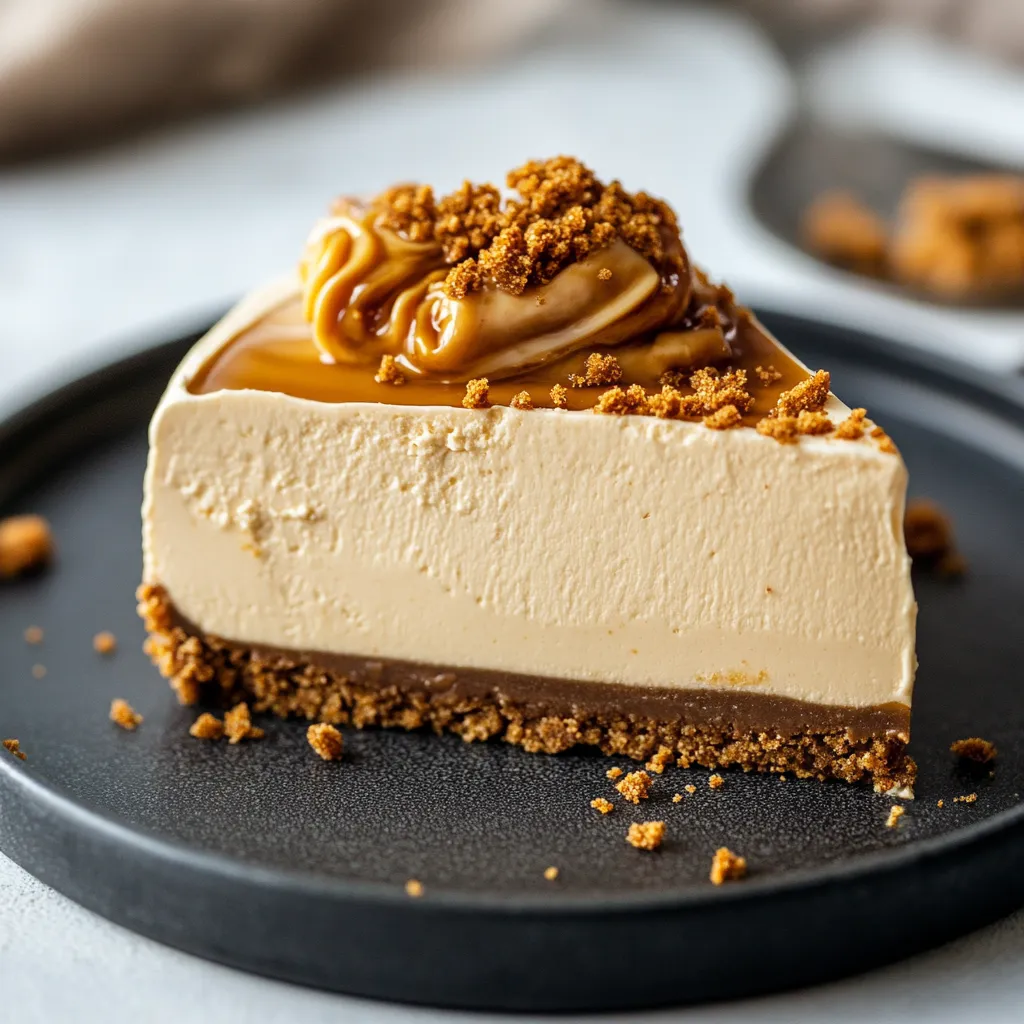
- Beat your room temperature cream cheese until it's nice and smooth. Slowly add room temperature Biscoff spread. In another bowl, whip cold double cream until you get soft peaks, then add it to your cream cheese mix.
- Putting It All Together:
- Gently fold your whipped cream into the cheese mixture. Pour everything over your cold base and smooth the top. Tap the pan lightly to get rid of air bubbles.
- Adding The Finishing Touches:
- Warm up some more Biscoff spread and pour it on top. Quickly sprinkle crushed cookies around the edge before the spread hardens.
 Pin it
My daughter now keeps jars of Biscoff spread in her kitchen just for making this cheesecake. The warm, caramel-like spiced flavor always makes me think of relaxing afternoons with a nice cup of coffee.
Getting The Perfect Smoothness
Getting that silky texture is all about watching your temperatures. Each ingredient plays its part in making the perfect slice. Let the cheesecake sit out for 15-20 minutes before serving to really bring out all the flavors.
Ways To Serve It
This cheesecake is fantastic on its own, but I like adding seasonal touches. Fresh raspberries add a nice tang in summer. In autumn, try a light sprinkle of cinnamon to enhance the warm spices. For special times, a thin drizzle of dark chocolate makes it extra fancy.
Keeping It Fresh
Your cheesecake will stay good in the fridge for up to 5 days if covered well. Use a cake cover or carefully wrap it with plastic, trying not to touch the top. When freezing, cut it first and put parchment between slices so you can thaw them one at a time.
Fixing Common Problems
If your filling seems too runny, you probably didn't whip the cream enough. Stick it in the freezer for 30 minutes before you continue. If your base falls apart, just cool it in the fridge a bit longer.
 Pin it
After trying tons of cheesecake recipes over the years, this Biscoff version is still my favorite creation. There's something magical about turning simple ingredients into something that makes people smile. It's not just about a tasty dessert, it's about creating special moments around the table with people you care about.
Frequently Asked Questions
- → How much chilling time does it need?
- You should let it chill for at least 4 hours, but leaving it overnight works best.
- → Why pick full-fat cream cheese?
- Full-fat cream cheese ensures the right consistency and keeps the dessert firm without baking.
- → Can this dessert be prepared beforehand?
- Definitely! It’s great to prepare ahead since it needs fridge time to set and stays fresh for a while.
- → How do you get it out of the tin?
- Use a warm knife to gently slide around the edges for an easy release.
- → Why gently melt the Biscoff spread?
- Gentle melting avoids overheating, which might mess up the cheesecake’s neat layers.