
 Pin it
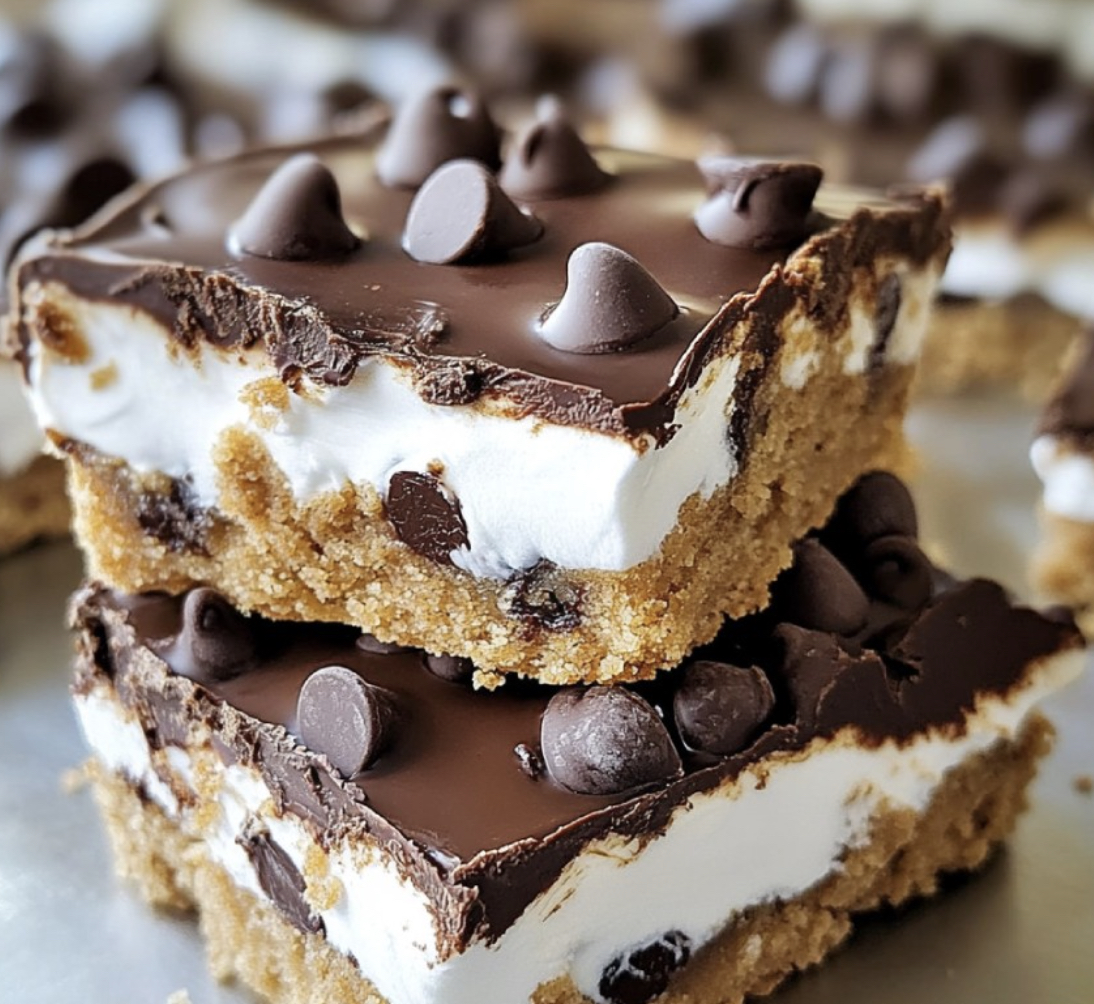
Triple-Layer Cookie Bars with marshmallow and chocolate turn a simple dessert into an unforgettable treat. These indulgent squares feature a soft, chocolatey cookie foundation, topped with a fluffy marshmallow middle, and crowned with smooth chocolate. The mix creates a perfect balance that isn't too sweet. They'll remind you of campfire s'mores but with a fancy twist, making them great for family get-togethers, group events, or just treating yourself on a lazy afternoon.
When I whipped these up for my sister's birthday party, they vanished in seconds. My little niece wondered if I'd gotten them from a fancy bakery—I couldn't have gotten a better compliment!
What You'll Need:
- Unsalted butter (1 cup, softened): This makes our cookie layer rich and gives that can't-beat buttery taste. Get it soft but not melty for the best results.
- Brown sugar (1 cup, packed): Brings moisture and a deep caramel flavor that regular sugar just can't match. Either light or dark works fine.
- Granulated sugar (1/2 cup): Helps get the sweetness just right and builds good cookie structure.
- Large eggs (2): These hold everything together. Let them sit at room temp before using so they mix in better.
- Vanilla extract (2 teaspoons): Makes every other flavor pop. Go for real vanilla instead of the fake stuff if you can.
- All-purpose flour (2 1/2 cups): Forms the base of our cookie layer. Spoon it into your measuring cup and level it off for the right amount.
- Baking soda (1 teaspoon): Gives just enough rise to keep things chewy instead of cakey.
- Salt (1/2 teaspoon): Cuts through the sweetness and makes flavors stand out. Don't leave it out!
- Chocolate chips (1 1/2 cups): Creates yummy pockets of melted chocolate throughout. Semi-sweet gives the best flavor mix.
- Marshmallow creme (2 cups): Creates our soft middle section. Better than using whole marshmallows which can leave gaps.
- Semi-sweet chocolate chips for topping (2 cups): Makes our shiny top layer. Works better than milk chocolate which can be too sweet.
- Coconut oil or butter (2 tablespoons): Helps the chocolate top stay smooth and keeps it from cracking when you cut it.
Making Your Cookie Bars:
- 1. Set Up Your Kitchen
- Move your oven rack to the middle and turn it on to 350°F (175°C). Coat your 9x13-inch pan with cooking spray, then line it with parchment paper that hangs over the long sides. This'll help you lift the bars out later without breaking them.
- 2. Mix Your Cookie Foundation
- Get your mixer (stand or hand) and beat the soft butter for half a minute until it's smooth. Dump in both sugars and beat them together for 2-3 minutes until the mix looks lighter and fluffier. Don't rush this part—it puts air in your dough.
- 3. Add The Wet Stuff
- Drop in one egg, mix for 30 seconds, then add the second and mix again. Scrape down the bowl with a spatula so everything mixes evenly. Pour in the vanilla and mix just until it's combined—don't go overboard.
- 4. Mix In Dry Ingredients
- In another bowl, stir together the flour, baking soda, and salt. Add this to your butter mixture in three batches, mixing slowly just until you can't see dry flour anymore. Your dough should look a bit undercooked to keep the cookies from getting tough.
- 5. Finish And Bake The Base
- Stir in the chocolate chips with a spatula, making sure they're spread throughout. Push the dough into your pan, creating an even layer all the way to the edges. Use slightly wet hands or a measuring cup to flatten it out. Bake for 20-25 minutes until the edges turn golden and the middle looks set but still a bit soft.
- 6. Let It Cool Down
- Put the pan on a cooling rack and leave it alone for 1-2 hours. You've gotta be patient here—if the base is still warm when you add the marshmallow, you'll end up with a gooey mess instead of nice layers.
- 7. Spread The Marshmallow
- Once it's completely cool, spread the marshmallow creme over the entire cookie base. Spray your spatula with cooking spray first so it doesn't stick. Work from the middle outward with light strokes so you don't pull up cookie pieces.
- 8. Melt The Chocolate
- Put chocolate chips and coconut oil in a microwave-safe bowl. Heat them in 30-second bursts, stirring well between each one even if the chips don't look melted yet. This stops the chocolate from burning. Keep going until it's completely smooth.
- 9. Put It All Together
- Pour the warm, melted chocolate over the marshmallow layer. Tilt the pan gently to help it reach the corners, then smooth it with a spatula. Tap the pan on the counter a few times to get rid of air bubbles.
- 10. Let It Set And Cut
- Wait until everything is completely firm before cutting. For clean slices, put it in the fridge for at least an hour, then use a knife dipped in hot water and wiped dry between cuts. For picture-perfect squares, trim the edges before cutting into 12 pieces.
My grandma always told me a bit of butter makes everything taste better, and these bars prove she wasn't kidding. When I use fancy European butter with more fat, the cookie base tastes almost like shortbread. Even my super-picky husband can't resist them. He says the marshmallow part takes him back to childhood fluffernutter sandwiches but "way fancier."
Keeping Them Fresh
These Triple-Layer Cookie Bars stay yummy for up to 5 days when stored right. The trick is putting parchment paper between layers in an airtight container so they don't stick together. Keep them on the counter if your house isn't too warm, or stick them in the fridge during summer. I've noticed they actually taste better on day two after the flavors have had time to mingle. Planning ahead for a party? These freeze great for up to 3 months—just let them thaw in the fridge overnight before serving.
Ways To Switch Things Up
You can easily change these bars to match your taste or what's in season. Try using white chocolate chips with dried cranberries in the cookie base for a holiday version. For some crunch, mix in 1/2 cup of toasted chopped walnuts or pecans. My favorite twist is adding a teaspoon of espresso powder to the cookie dough—it makes the chocolate taste deeper without making it taste like coffee. The great thing about this recipe is how forgiving it is—you can add almost anything as long as you don't mess up the wet-to-dry balance too much.
Fun Ways To Serve Them
While these bars taste amazing on their own, dressing them up for special occasions makes dessert time extra memorable. Try warming a square for 10-15 seconds in the microwave and putting a small scoop of vanilla bean ice cream on top—the hot-cold contrast is amazing. For dinner parties, cut them into tiny bites and arrange them on a platter with fresh berries and mint for a fancy look. During Christmas, I like to drizzle a little caramel sauce over them and sprinkle some flaky sea salt on top right before serving. This simple touch turns them into a sophisticated treat worthy of your best dishes and candlelight dinner.
Frequently Asked Questions
- → Could I swap marshmallow creme with mini marshmallows?
Sure, mini marshmallows work too! Use about 3 cups, spread them on the baked cookie base, and pop them in the oven for 2-3 minutes until they're soft but not browned. Pull them out and gently spread the melty marshmallows into an even layer before adding the chocolate.
- → How do I properly store these bars?
Keep them fresh in an airtight container. They'll last 2-3 days at room temperature or up to a week in the fridge. If you stack them, lay parchment paper between the layers to avoid sticking. You can freeze them too for as long as 3 months—just let them thaw on the counter before serving.
- → Can these be prepped in advance?
Yep! They're great for prepping ahead. Make them 1-2 days before serving. In fact, the flavors improve as they sit. Just make sure to store them airtight so they stay fresh.
- → Any tips for cutting the bars neatly?
For sharp, clean edges, refrigerate the bars first so the chocolate becomes firm. Use a sharp knife heated in hot water and wipe between each cut. A plastic knife also works well to slice through the marshmallow layer without sticking.
- → Can I add more goodies to the cookie base?
Absolutely! Toss in extras like chopped nuts, crushed pretzels, or toffee bits—about 1/2 cup. Be careful not to exceed 1 cup of add-ins or the dough might get too heavy.
- → What’s an alternative to coconut oil for the topping?
No coconut oil? No problem. Use equal amounts of butter, shortening, or vegetable oil. Each will set the chocolate a little differently—butter softens it, while shortening makes it firmer.