
 Pin it
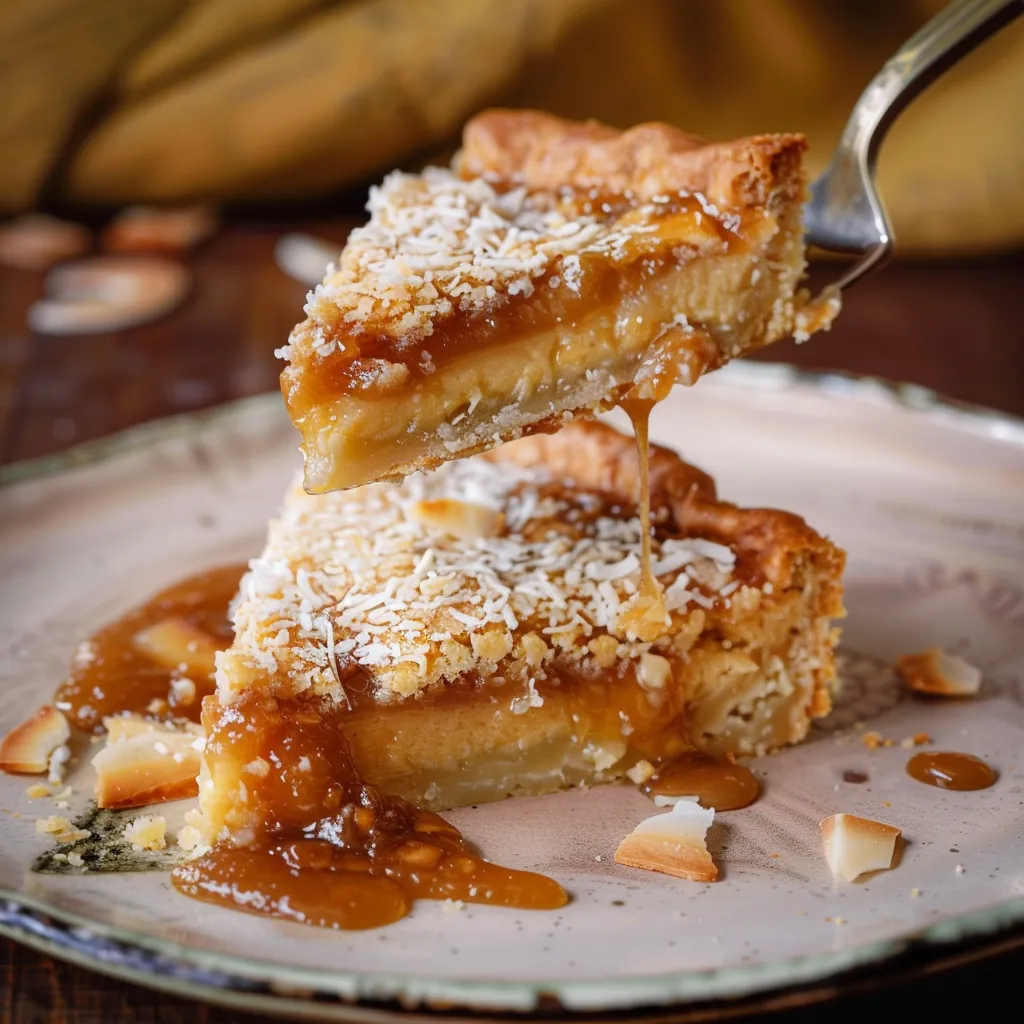
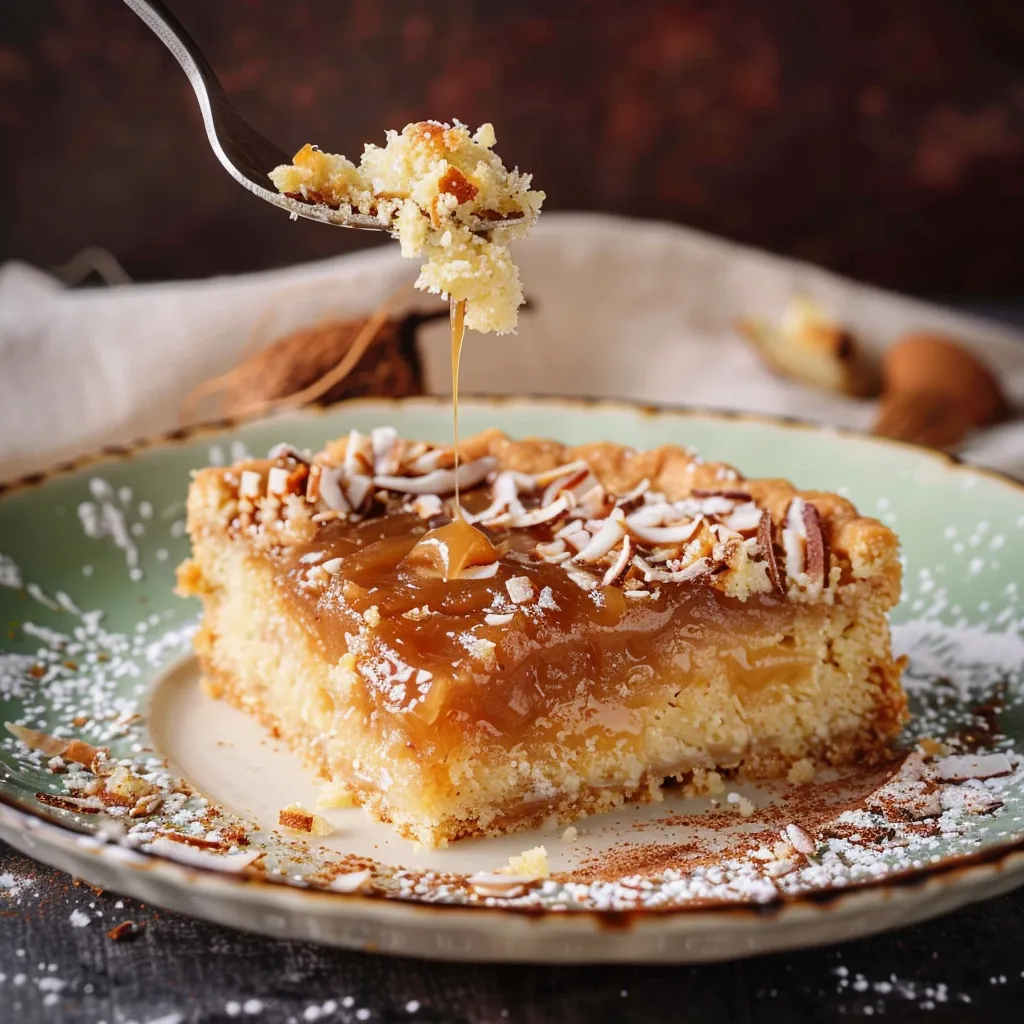
This coconut and dulce de leche tart brings a fun mix of creamy caramel sweetness and the punchy bite of coconut. Crisp crust, gooey caramel, and soft coconut topping all work together for a special treat that's too good to skip—perfect for when you wanna make something a little fancy.
I first put this together for my mom's birthday—she's wild about coconut. Ever since then, it somehow shows up at every family get-together. Somebody always grabs an extra slice before heading out the door.
Essential Ingredients
For the base- All-purpose flour: 250 g — Grab a solid-quality flour to make sure your crust turns out right
- Egg yolks: 3 — Lends a nice golden look and some richness
- Vanilla extract: 1 teaspoon — Real vanilla gives the best scent and flavor
- Granulated sugar: 100 g — Just enough to keep it sweet, but not over-the-top
- Unsalted butter: 150 g — Let it come to room temp so mixing is easy
- Heavy cream: 60 g — Levels up the topping with extra creaminess
- Honey: 30 g — Adds a hint of depth and a nice golden top
- Vanilla extract: 2 tablespoons — Kicks up all the coconut notes
- Eggs: 3 — Binds the whole thing and keeps the topping fluffy
- Granulated sugar: 120 g — Brings the sweet back in, balancing the coconut
- Shredded unsweetened coconut: 300 g — The fresher the coconut, the better everything tastes
- Dulce de leche: 250 g — Go for the good stuff or make your own to really shine
- White chocolate for drizzling: 50 g — Great for making little fancy decorations
- Powdered sugar: 2 tablespoons — Dust it on for a snowy look
- Gold pearls or sprinkles: Gives a sparkly, celebratory finish
Luscious Step-by-Step Directions
- Finishing touches:
- Once cooled, use a small sieve to sprinkle powdered sugar all over for a wintry look. Add your chocolate flowers and a handful of gold pearls right on top to really make it sparkle.
- Chocolate flowers:
- Melt your white chocolate either in the microwave in short bursts or in a heatproof bowl over simmering water. Scoop it into a piping bag and doodle little flowers on parchment. Pop a gold pearl in the middle before the chocolate sets, then chill till firm.
- Pop it in the oven:
- Bake in an oven heated to 170°C for about 40 minutes. The topping should be golden brown and not wobbly when you jiggle the pan a bit. Let it cool down all the way before you go wild with the decorating and slicing.
- Coconut topping goes on:
- Carefully pour the coconut mixture over the caramel layer and spread it out gently to touch the crust edge. Smooth the top with your spatula.
- Build your tart:
- Bring out the chilled crust and smooth dulce de leche all over the bottom—try for an even layer to keep things tidy when you cut.
- Bring in that coconut:
- Fold shredded coconut and cream in with a spatula, using light, slow strokes. This keeps the topping airy—don’t go overboard, or you’ll lose the fluff.
- Mix up the filling:
- In a large bowl, whip your eggs, sugar, honey, and vanilla till they’re pale and kind of thick. Using a hand mixer speeds this up and works in loads of air—it’ll take close to 5 minutes.
- Crust in the tin:
- Gently move the rolled dough into your tart pan and press it into the edges. Stab the base with a fork a few times so it won’t bubble up. Tuck the pan in the freezer while you deal with the topping—helps everything keep its shape in the oven.
- Base is ready:
- Sprinkle some flour on your surface, then roll out the dough till it’s about 3–4 mm thick. Let it soften just a little by kneading lightly, so it rolls easier once out of the fridge.
- Mix in the flour:
- Add flour bit by bit and keep going until it’s all mixed in—don’t overdo it, or you’ll get a chewy crust. Smoosh the dough together by hand, wrap it up tight and rest in the fridge for half an hour (lets the butter firm up again).
- Start the crust:
- Pop butter, sugar, and vanilla in your stand mixer and beat until it’s pale and fluffy—getting lots of air in at this point helps you land that crumbly crust. Toss in the egg yolks and beat for around 2 minutes to fully combine.
This dessert holds a special place for me. It brings back memories of my grandma whipping up treats in Argentina during hot summers. When the vanilla hits the filling, it instantly brings me back to those sunny, orange-blossomy childhood days.
Keeping It Fresh
Want the tart to last? Cover it with plastic wrap or use an airtight container and keep it chilled. It’ll stay good for about four days—flavors and texture stick around just fine. Take it out about half an hour before you wanna dig in—letting it hit room temp makes the flavors pop. The base might get a bit softer over time from the filling, but it won’t mess with the taste.
Swap-Out Ideas
No dulce de leche? Thick caramel works, or you can turn sweetened condensed milk into dulce de leche, just simmer the unopened can in water for about three hours. For a gluten-free twist, switch the regular flour for your fave gluten-free blend—don’t forget a pinch of xanthan gum. Not into super sweet? Drop the sugar to 90 g in the topping, and grate in some orange zest to bring out the coconut even more.
Serving Tips
It’s amazing just barely warm, especially with a scoop of vanilla ice cream melting on top. If you like some tang, a little homemade berry sauce cuts the richness. Around the holidays, pour a glass of something sweet like Sauternes or Muscat—they really work with the caramel vibe. For a brunch treat, slice it small and pair with a strong fresh coffee or a classic espresso.
 Pin it
Backstory and Vibes
This tart gets its spark from the baking styles in Argentina and Uruguay—where dulce de leche is a real staple. Mixing it with coconut is super popular in beachy spots along Latin America's coast. The story goes dulce de leche’s been around since the 1800s, born when someone left sweetened milk too long overheat and got lucky. I tried the classic during a trip to Buenos Aires and had to whip up my own version. I’m always impressed at how simple flavors can make something so memorable.
Frequently Asked Questions
- → How do you get a perfect buttery crust?
Blend butter and sugar until smooth, then mix in the egg yolks. Add flour but don’t overwork it to keep the dough tender. Chill the dough before rolling and baking.
- → Can I swap out the dulce de leche?
Absolutely! Try using another jam or homemade salted caramel for a different flavor twist.
- → What chocolate works best for decoration?
White melting chocolate or candy melts are great options. You could also play around with dark or milk chocolate to change the look.
- → How long does the tart stay fresh?
Store it in an airtight container in the fridge for up to three days. Let it come to room temperature before eating for the best texture and flavor.
- → Can I use a different pan?
A medium-sized tart pan (around 23-25 cm) works great, but you could switch to smaller molds for individual servings, too.