
 Pin it
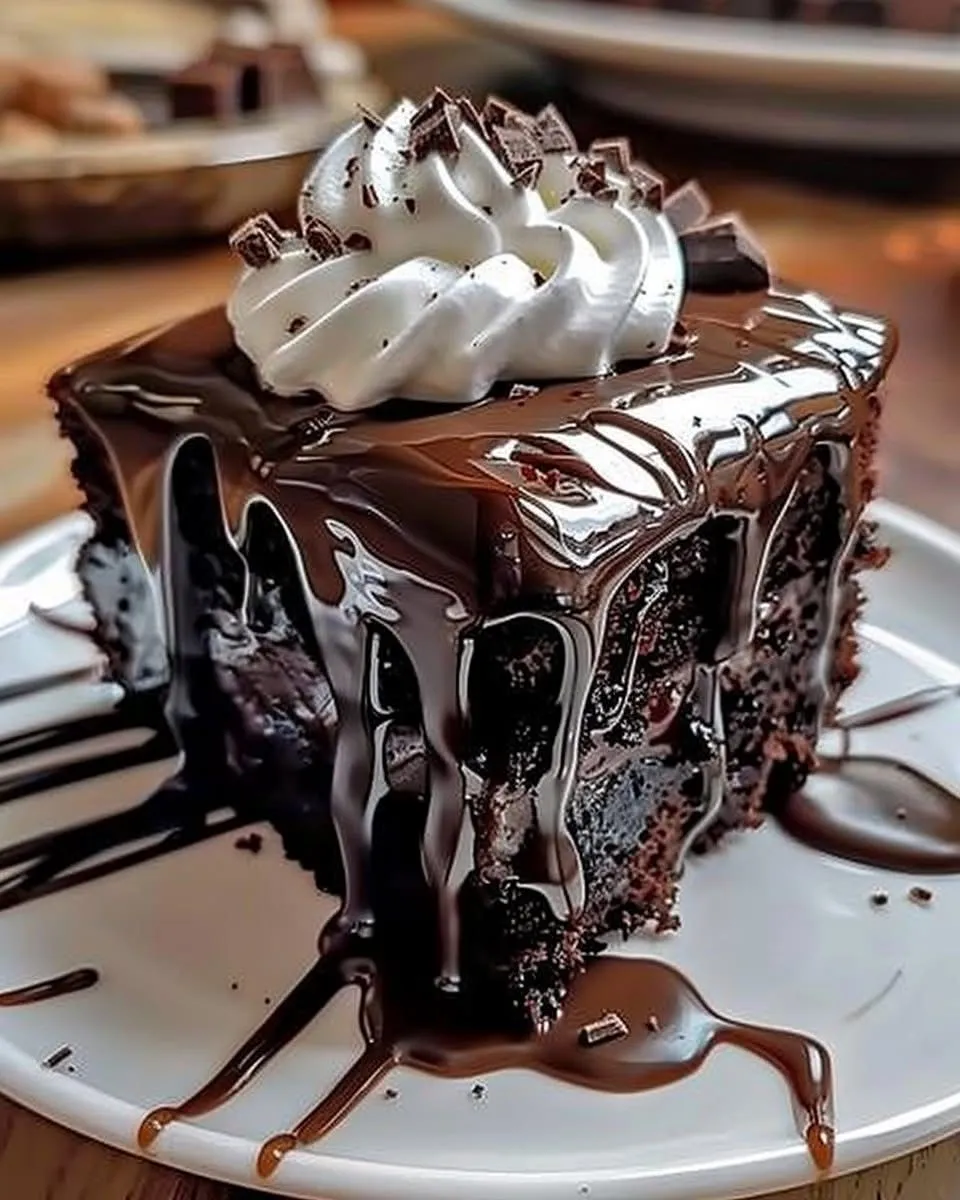
This luscious chocolate cake turns basic kitchen staples into something truly special that'll have everyone asking for more. The trick is using boiling water, which really brings out the chocolate taste and makes an unbelievably juicy texture that doesn't dry out for days.
I whipped this cake up when my daughter turned ten after the bakery cake fell apart just hours before her friends arrived. When she tasted it, her reaction told me we'd never need store-bought again.
What You Need
- All purpose flour: Gives the right texture without getting tough
- Granulated sugar: Cuts the cocoa bitterness and helps keep things moist
- Unsweetened cocoa powder: Brings that deep chocolate kick; Dutch processed makes it darker
- Baking powder and baking soda: Team up for the perfect lift
- Salt: Makes every flavor pop, especially the chocolate
- Large eggs: Hold everything together and add richness
- Whole milk: Adds needed fat for softness; don't go below 2%
- Vegetable oil: Keeps your cake from drying out
- Vanilla extract: Complements the chocolate; skip the fake stuff
- Boiling water: Wakes up the cocoa for stronger flavor
- Unsalted butter (for frosting): Lets you decide how salty it gets
- Powdered sugar: Makes your frosting velvety smooth
- Milk: Gets the frosting just right for spreading
How To Make It
- Get Everything Ready:
- Heat your oven to 350°F and fix up two 9 inch round pans with butter and a sprinkle of flour or cocoa. I always add parchment circles on the bottom just to be safe.
- Combine Dry Stuff:
- Stir flour, sugar, cocoa, baking powder, baking soda, and salt in a big bowl until they're totally mixed with no cocoa clumps. This makes sure your cake rises evenly.
- Add Wet Stuff:
- Drop in eggs, milk, oil, and vanilla to your dry mix and beat with a mixer for about 2 minutes on medium. Your batter will look pretty thick now.
- Pour In Hot Water:
- Add the boiling water and mix slowly. This is when the magic starts as the hot water brings out the cocoa flavor and thins the batter. Don't worry if it looks runny - that's exactly what you want.
- Bake It Up:
- Split the batter between your pans and bake for 30 to 35 minutes. You'll know they're done when a toothpick comes out with just a few sticky bits.
- Let It Cool:
- Keep the cakes in their pans for 10 minutes before taking them out onto cooling racks. They need to cool totally before frosting, at least an hour.
- Whip Up Frosting:
- Beat soft butter until it's fluffy, about 3 to 4 minutes. Slowly add powdered sugar and cocoa, mixing in some milk and vanilla as you go. Keep beating until it gets light and creamy, around 5 minutes.
- Put It All Together:
- Set one cool cake on your plate and spread frosting on top. Add the second layer and frost everything, starting from the top and working down the sides.
My grandma always told me to toss in a tiny bit of espresso powder with the dry stuff, though it wasn't in the family recipe. You can't taste coffee at all but somehow it makes the chocolate way richer.
Keeping It Fresh
This cake stays moist way longer than other homemade ones. You can keep it in a sealed container on your counter for up to 3 days. If you need longer, stick it in the fridge for up to a week, but let it warm up before eating for the best taste. If you haven't frosted the layers yet, wrap them tight in plastic and foil and freeze them for up to 3 months.
Mix It Up
The standard recipe works great as a starting point for tons of twists. Try adding raspberry jam between the layers for some fruitiness. Mix in a spoonful of instant espresso for a mocha vibe. Switch the vanilla in the frosting with peppermint around Christmas time. For a grown-up version, splash some coffee liqueur on each layer before you frost it.
Ways To Serve It
The cake tastes amazing by itself, but gets even better with the right sides. Try it with a scoop of vanilla ice cream for hot-cold contrast. Fresh berries cut through the richness with their tartness. For fancy events, sprinkle some edible gold flakes or chocolate curls on top. Pop slices in the microwave for 10 seconds to make them extra cozy.
Frequently Asked Questions
- → Is there a flour swap for lighter cakes?
You can try using cake flour instead of all-purpose for a softer texture, or go for gluten-free flour to suit different diets. Results might vary slightly.
- → What's the best way to stop layers from sticking?
Make sure to grease your pans with oil or butter, add a sprinkle of flour, and line with parchment paper to keep your layers from sticking.
- → Is it possible to make this without eggs?
Yes! Replace eggs with flaxseed meal mixed with water or unsweetened applesauce for a great egg-free version of this cake.
- → How should I store leftover cake?
Pop any leftovers in a sealed container. It’ll keep for up to 2 days at room temperature or a week in the fridge.
- → Can I freeze cake layers for later?
Sure! Wrap the cooled layers in plastic and foil tightly. Freeze for up to 3 months and make sure to thaw fully before decorating.