 Pin it
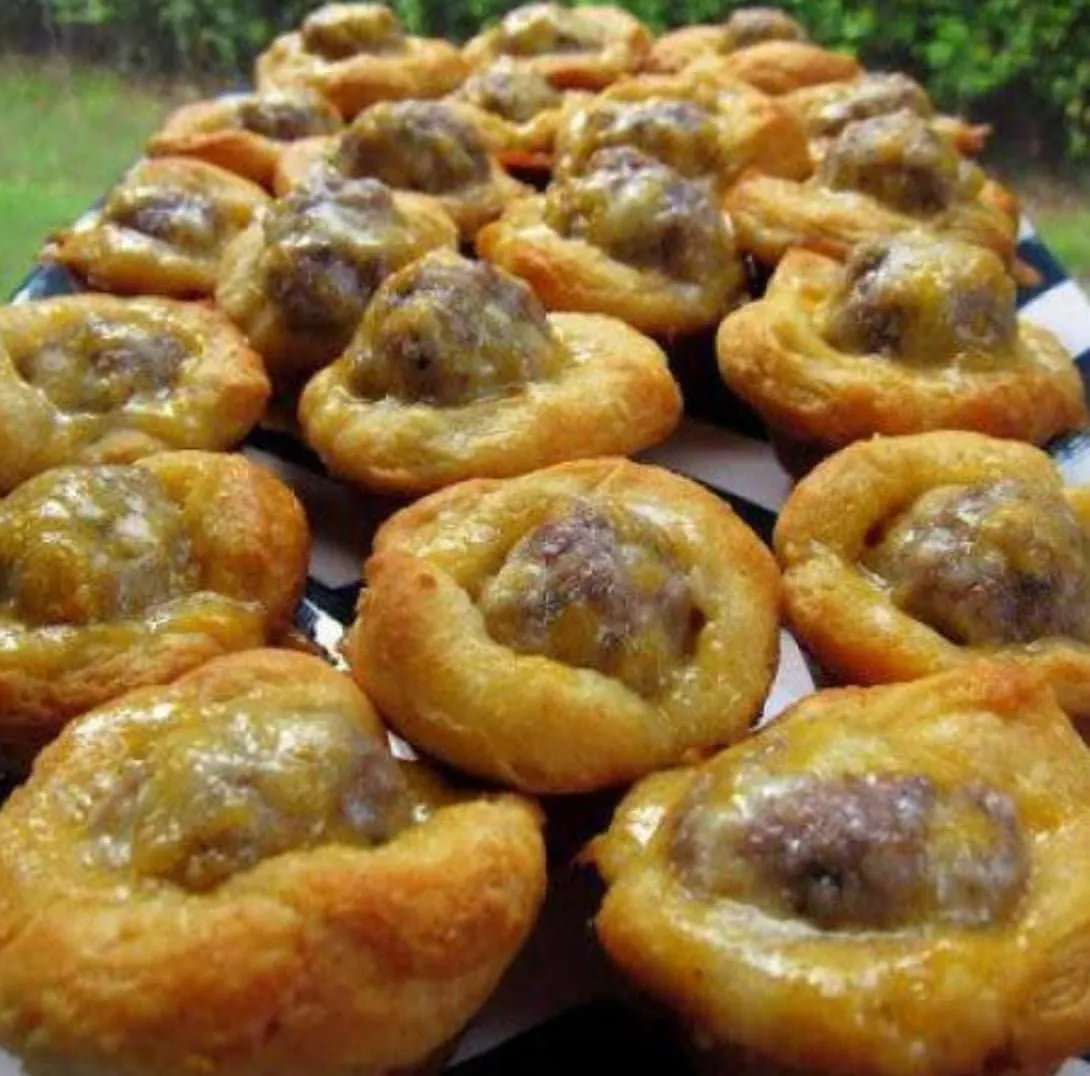
My crowd-pleasing sausage cheese biscuit nibbles vanish instantly at every gathering. They combine crispy, layered biscuits wrapped around juicy sausage and gooey cheese to create small, mouthwatering treats that win over everyone from toddlers to grandparents.
I whipped these up during a rushed game day get-together when I needed something quick but satisfying. Everyone thought I'd slaved away for hours, and now they're the first thing friends ask about whenever I'm hosting.
What You'll Need
- Layered biscuits: Their natural layers make perfect pockets for stuffing and turn gorgeously brown when baked. The Grands Jr. variety fits mini muffin cups perfectly.
- Morning sausage: Delivers the rich, meaty base these treats need. I like Tennessee Pride, but any good quality breakfast meat works nicely.
- Grated cheddar: Brings the delicious meltiness that makes everyone grab seconds. Grate your own for smoother melting compared to bagged options.
How To Make Them
- Get your oven ready:
- Heat to 400°F and give your mini-cupcake tray a light coating of grease. The hot temperature helps get that perfect outer crunch while making sure the meat cooks fully.
- Mix your stuffing:
- Stir together raw sausage and grated cheddar in a bowl. Mix gently with your fingers until everything's combined but not overworked. Shape into 40 small balls about the size of big marbles.
- Set up your biscuits:
- Pop open the biscuit cans and split each biscuit into two thin rounds. Push each round into a greased mini-cupcake spot, working the dough up the sides to form little cups.
- Put it all together:
- Drop one meat-cheese ball into each dough cup, pressing down gently. Cook in your hot oven for 8-10 minutes, watching for the cups to turn golden and the filling to bubble and fully cook.
What makes these treats special is finding sausage with just the right amount of fat. Too dry and they won't taste rich enough; too greasy and they'll soak through the biscuits. We always double up the batch during holidays so we can munch on them throughout the day while cooking the main feast.
Plan-Ahead Tips
You can freeze these tasty bites before or after cooking. For raw freezing, get them all assembled in the pan, freeze until hard, then pop them into freezer bags for up to 2 months. When you're ready to cook, just add 3-4 extra minutes to the baking time. If freezing after cooking, let them cool completely first, then warm in a 350°F oven for about 10 minutes when you want to serve them.
Flavor Variations
While they're fantastic as is, you can easily change things up. Try using pepper jack instead of cheddar for some heat, or mix a bit of sage and thyme into your sausage. For a morning twist, tuck in tiny bits of scrambled egg before baking. Want an Italian flair? Use Italian sausage with mozzarella and a sprinkle of oregano for pizza-like bites.
Serving Suggestions
These little bites fit almost any occasion. For breakfast, they go great with sliced fruit and a dollop of yogurt. As party food, set them out with maple syrup for dipping if you want something sweet, or spicy mustard if you prefer a kick. They're filling enough to star at a brunch table but small enough to include in a bigger spread of finger foods.
Frequently Asked Questions
- → Can I pick another cheese?
Definitely! Swap cheddar for mozzarella, Jack, or Colby for a twist on flavor.
- → Can I prep them ahead?
Sure! Make the sausage-cheese mix and set up the cups. Keep them in the fridge before baking.
- → How do I know the sausage is cooked?
Look for golden biscuits and well-cooked sausage. A meat thermometer at 160°F will confirm it's done.
- → Can I store leftovers in the freezer?
Yep! Let them cool completely, then pack in a container or bag. Reheat in the oven or microwave later.
- → What kind of sausage works best?
Any breakfast sausage is great, but spicy ones add a flavorful kick!
