
 Pin it
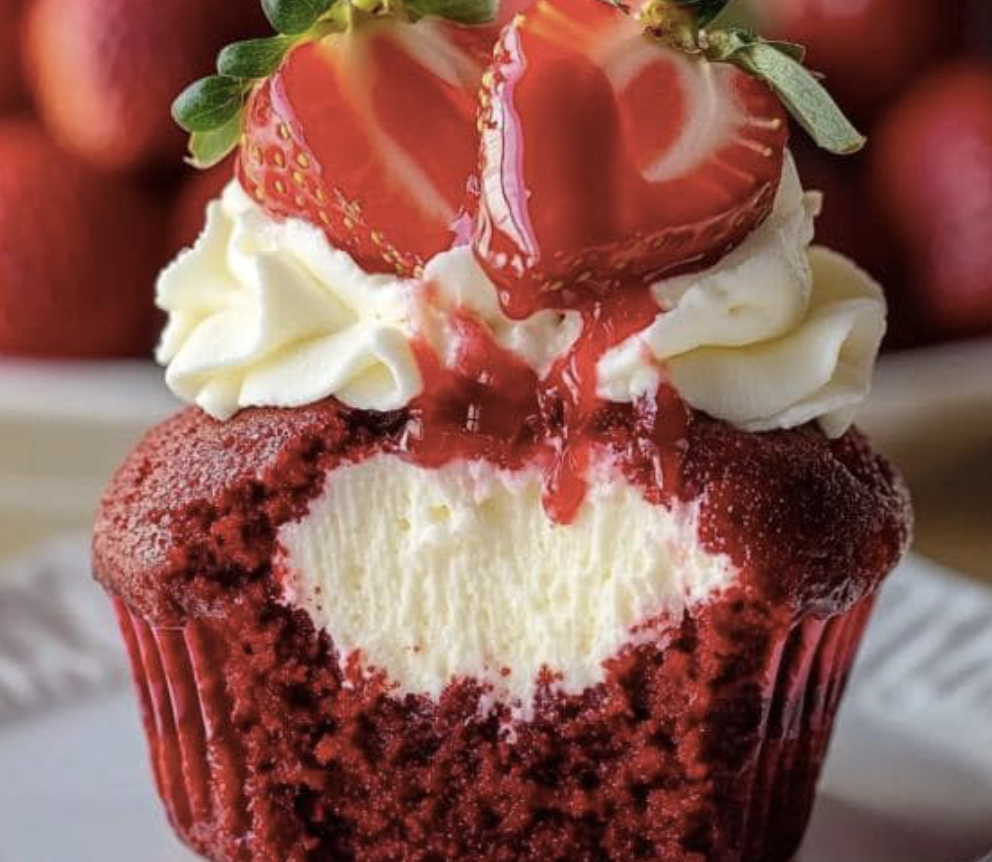
This mouthwatering triple-threat dessert brings together red velvet cake, smooth cheesecake, and fresh strawberries in one amazing bite. The velvety crimson base hides a luscious cheesecake surprise, topped with airy whipped cream and juicy strawberries—creating a treat that tastes even better than it looks.
I whipped these up for my little girl's party a few years back, and now we can't celebrate anything without them. Everyone always gasps when they bite in and find that creamy center—the surprised faces are almost as good as the cupcakes themselves!
Ingredients
- All-purpose flour: Creates the base texture of our red velvet treats, giving just the right amount of structure
- Cocoa powder: Delivers that hint of chocolate flavor essential in authentic red velvet
- Buttermilk: Makes everything soft and adds a nice zip to the flavor profile
- Red food coloring: Transforms ordinary cake into eye-catching red velvet magic
- Cream cheese: For that dreamy middle layer, make sure it's full-fat and sits out until soft
- Fresh strawberries: Bring brightness and natural sweetness to finish things off
- Heavy cream: Turns into billowy soft topping that perfectly complements the richer elements underneath
Step-by-Step Instructions
- Create the Cheesecake Filling:
- Whip softened cream cheese until it's completely lump-free. Mix in sugar and vanilla until everything's blended, then gently fold in the egg just until mixed. Don't overbeat—you want a smooth mixture that's thick but still spreadable. This will become the heavenly center of your cupcakes.
- Mix Up the Red Velvet Batter:
- First, mix all dry stuff together, making sure the cocoa powder gets evenly spread throughout. In another bowl, beat butter and sugar for about 3 minutes until it looks pale and fluffy. This step traps air and helps your cupcakes rise nicely. Add in egg and vanilla, then mix in buttermilk, vinegar, and food coloring. You'll watch the transformation into that gorgeous ruby color that everyone loves.
- Put Everything Together:
- Start by spooning some red velvet batter into each cup. Then drop a good tablespoon of cheesecake mix right in the middle. Cover with more red velvet batter without disturbing that center pocket. Don't fill the cups more than three-quarters full or they'll overflow as they rise.
- Bake Them Right:
- Get them into your preheated oven and don't peek for at least 15 minutes. They need steady heat to rise properly. Check if they're done by sticking a toothpick near the edge—not the middle where you'll hit the cheesecake part.
- Whip Up the Topping:
- Take cold heavy cream, powdered sugar and vanilla and start beating slowly, then speed up gradually. Keep an eye on it and stop when you see stiff peaks forming. Don't go too far or you'll end up making butter! The cream should stand up firmly when you lift the beater.
- Finish Them Off:
- Once cupcakes are totally cool, add the whipped cream on top. Place half a strawberry at a slight tilt for a pretty look. If you're using strawberry glaze, just add a small drizzle to make them look fancy.
The first batch I ever made turned into what we now call "exploding cupcakes" because I stuffed way too much cheesecake filling inside each one. They weren't pretty at all, but everyone fought over those messy treats. It taught me that sometimes the biggest kitchen mistakes turn into family favorites!
Make-Ahead Options
You can break up the work to fit your schedule. Bake the cupcakes without frosting a day early and keep them covered on your counter. It's best to make the whipped topping close to serving time, though adding a stabilizer will help it last several hours in the fridge. For parties, you can put everything together except the strawberries, then add those right before you bring them out.
Ingredient Substitutions
Got food issues? No problem. You can swap in a good gluten-free flour mix instead of regular flour without much difference. No buttermilk? Just add a spoonful of lemon juice or white vinegar to regular milk and wait 5 minutes. If you don't like artificial colors, try beetroot powder for a more natural red color, though it won't be as bright as food coloring.
Serving Suggestions
Show off these fancy cupcakes on a pretty tiered stand at your next get-together. They look great with chocolate-dipped strawberries nearby and glasses of bubbly for grown-ups or strawberry lemonade for kids. They're also perfect for date night dessert paired with a small scoop of vanilla ice cream on the side.
Storage Tips
Keep your finished cupcakes in the fridge for up to three days in a container that won't squish the tops. They actually taste even better on day two after the flavors have mixed together more. If you want to work ahead, you can freeze the unfrosted cupcakes for up to a month—just wrap each one in plastic wrap and put them in a freezer bag. Let them thaw completely before adding fresh whipped cream and strawberries.
Frequently Asked Questions
- → How do you keep cupcakes tender?
Stick to buttermilk and soft butter for the batter. Also, don’t leave them in the oven too long!
- → Can I prep these cupcakes early?
Sure! Bake and store them in a sealed container for 2 days. Add whipped cream and toppings right before serving.
- → Is there a natural red food color option?
Yes, you can try beet powder or even a bit of raspberry juice for a natural red shade.
- → What’s the best way to store extras?
Keep them chilled in a sealed container for up to 3 days. Let them come to room temp before you eat them for the best taste.
- → Can I swap the cheesecake filling?
You can try mascarpone or a thick custard instead, though the texture and flavor will change a bit.