
 Pin it
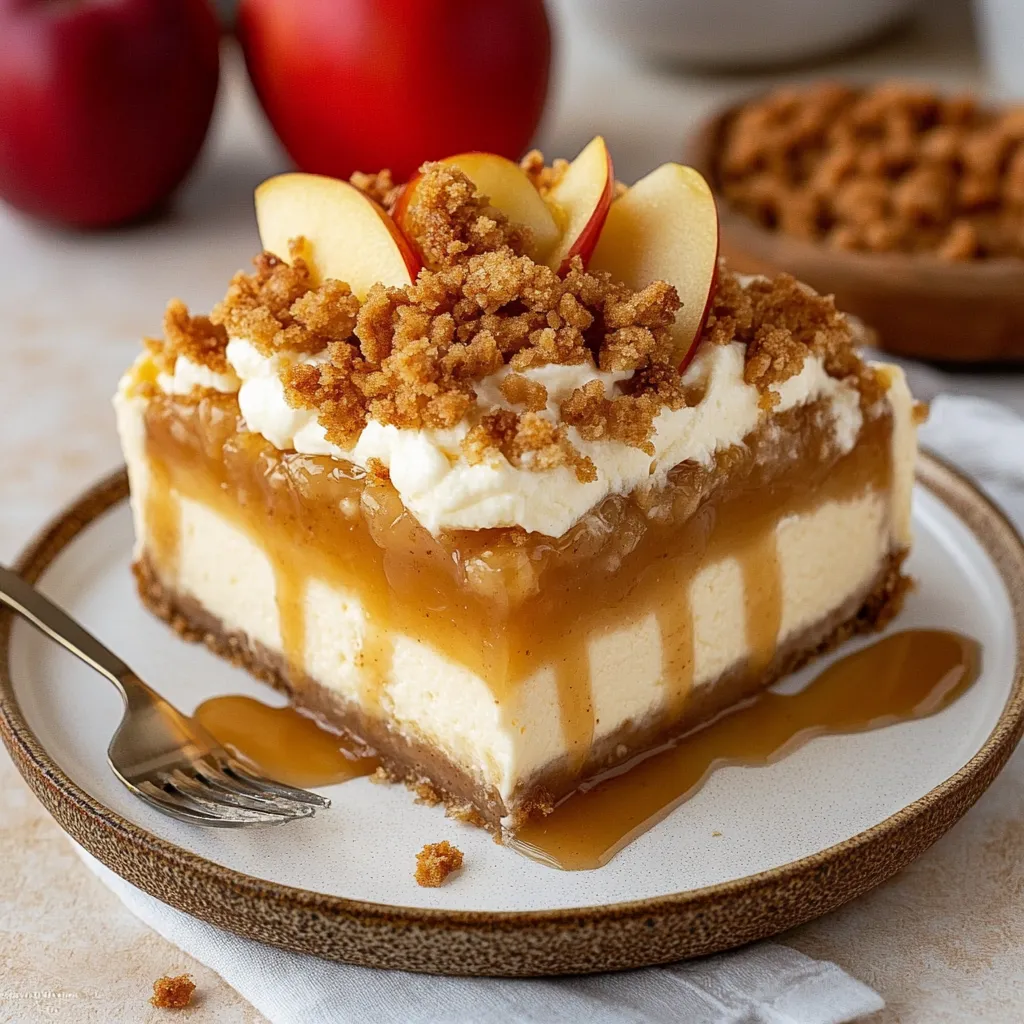
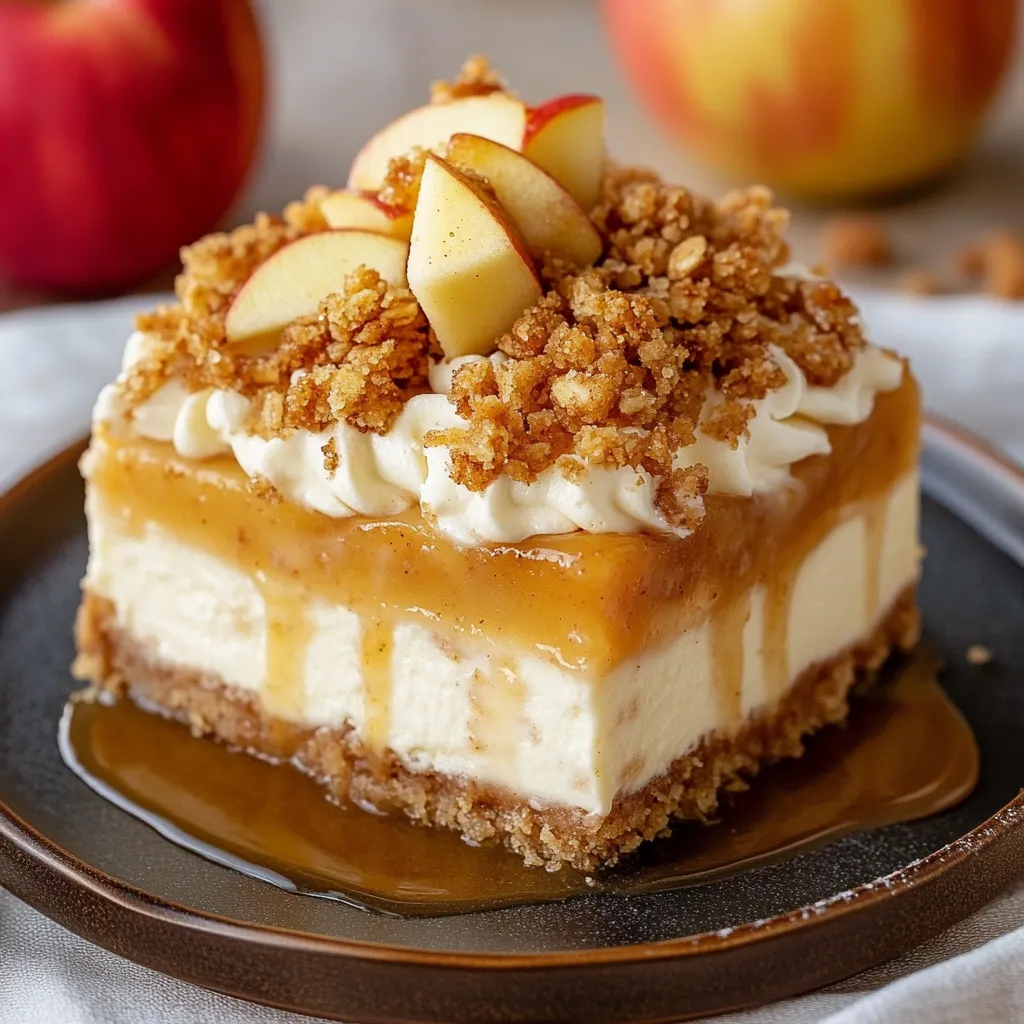
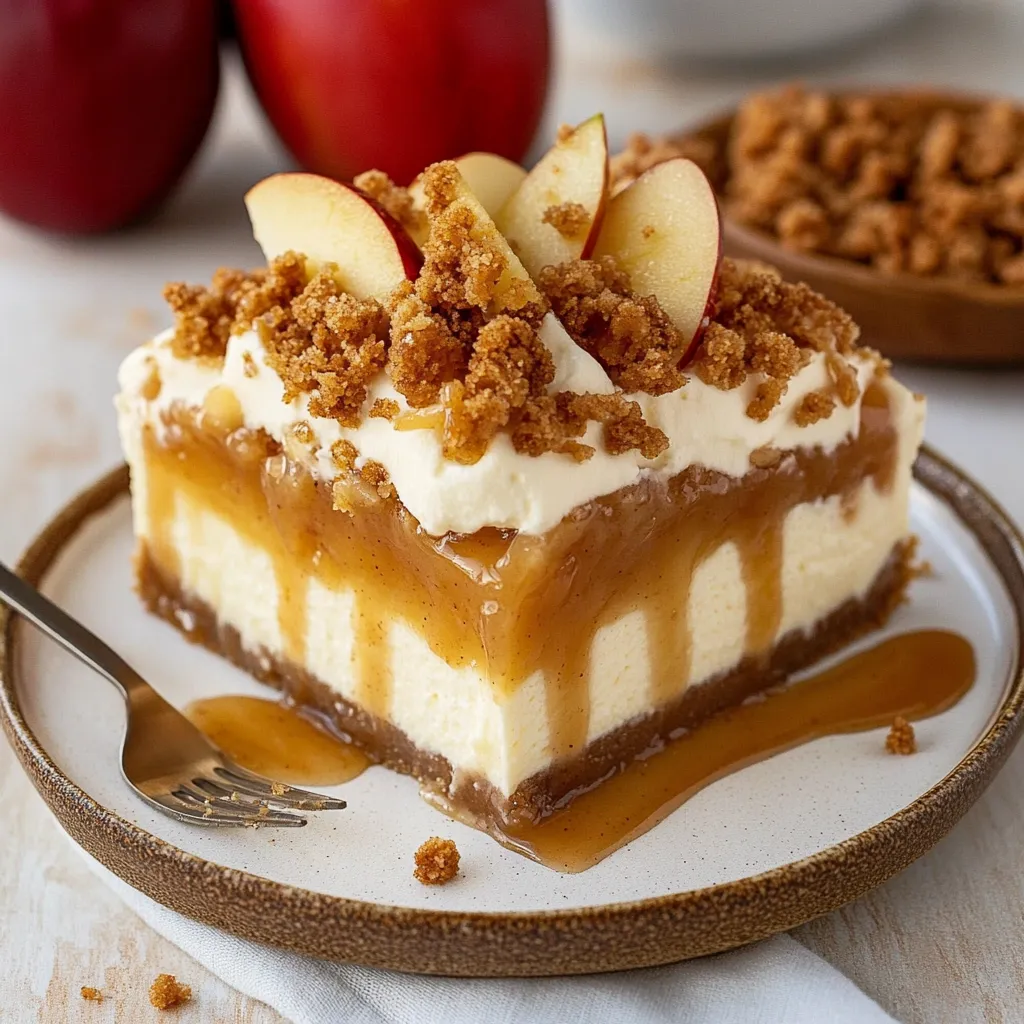
This super-rich Apple Crisp Cheesecake mash-up blends your favorite fall sweets in one eye-catching dessert. A cinnamon-kicked oat crumble and brown sugar apple layer sit on top of thick creamy cheesecake, all backed by a crunchy graham cracker base.
This started as my attempt to pick between apple crisp, cheesecake, and pie at Thanksgiving. It was such a hit, now my nieces always ask for it on their birthdays every fall. It's a family tradition for us now.
Irresistible Ingredients
- Quick oats: these make the crumbly topping extra crispy you can swap in rolled oats if you like a chunkier bite
- Brown sugar: brings a richer, deeper sweetness that matches up great with apples
- Cream cheese: go with full-fat Philadelphia and let it soften to room temp for the smoothest middle
- Gala apples: they bake up sweet but stay firm in the oven always pick fruits without soft spots
- Cinnamon graham cracker crumbs: these set the stage, giving a spicy, crunchy starting point
- Cinnamon: shows up all over for big autumn flavor Saigon cinnamon is extra bold if you’re going all out
Simple Steps To Make It
- Get that Water Bath Set:
- Lay a big sheet pan with water on your oven’s bottom rack then crank the heat to 350°F. This extra moisture keeps the cheesecake from breaking apart as it bakes. Fully line your springform pan with parchment so it pops out later.
- Blend the Crisp Top:
- Rub flour, oats, brown sugar, cinnamon, and melted butter with your hands until you see both big and little clumps. Those different sizes make that classic crunchy layer everyone fights over.
- Assemble and Bake:
- Spread the creamy cheesecake filling over your crust in the springform pan, then gently pile on the apple mix. Shower everything with that oaty topping. Cook the whole thing right above your steamy water tray for about 50-55 minutes so the middle stays just a little shaky if you nudge the pan.
- Mix Up the Filling:
- Whip the soft cream cheese and brown sugar together for a good 3 minutes till super smooth and light. Add vanilla, cinnamon, then flour for structure. Toss in eggs one at a time, mixing gently. Any lumps will stick around, so get it silky now—but don't over-beat or it’ll crack.
- Start on the Crust:
- Stir melted butter, sugar, and graham crumbs until they look like damp sand. Push them all over your pan’s bottom and flatten everything down with the back of a cup for an even base.
- Apple Layer Comes Next:
- Coat the peeled, chopped apples in cinnamon and brown sugar. Let it sit for five minutes so the fruit gets juicy and soaks up the flavors—trust me, this seriously amps up the apple punch.
 Pin it
Don’t skip the cinnamon—it’s the real star here and ties every layer together. My grandma always slipped extra in, not just with the apples but even in the filling. Now, when the house smells like this baking, we all know fall is really happening.
Handy Make-Ahead Ideas
Bake this cheesecake a couple of days in advance and stash it right in the fridge, still in its pan, until you're ready to show it off. Waiting makes it taste even better—the apples work their magic on the creamy layer. If you want to top with warm caramel, save it for right before you serve to keep things crisp.
How To Serve
A warm pour of caramel sauce takes this dessert up another notch for special nights. Let the slices warm up a bit at room temp before you dig in—not straight from the fridge—so the flavors can really sing. For a final touch, add a fluffy dollop of whipped cream to balance the sweet and creamy layers.
Fun Ways To Change It Up
If you’re feeling creative or can’t find Gala apples, try Honeycrisp for more crunch and sweetness or go tart with Granny Smith. You could even mix a few kinds for deeper flavor when apples are at their best. Want to intensify the apple flair? Blend in a spoonful of apple butter with the cream cheese.
 Pin it
Frequently Asked Questions
- → Can I try different kinds of apples for this dish?
Of course! Although Gala apples work great for their balance of sweetness and texture, you can opt for Honeycrisp, Braeburn, or even Pink Lady apples. Avoid softer types like McIntosh—they might turn mushy while baking.
- → Why do I need to bake it in a water bath?
The water bath helps the cheesecake bake more evenly and keeps it from cracking. It adds moisture in the oven and ensures a smooth, creamy texture.
- → Can I prepare this dish ahead of time?
Definitely! It actually tastes better when chilled properly. Let it rest for 6 hours or preferably overnight in the fridge. Add toppings like caramel right before serving.
- → Is there a way to make this dish gluten-free?
Yes, just use gluten-free graham crackers for the crust, certified gluten-free oats for the topping, and swap the flour with a 1:1 gluten-free blend.
- → How do I get clean slices when serving?
For neat slices, dip a sharp knife into hot water, wipe it clean, and repeat this between each cut. The heat helps slice through the layers smoothly, keeping the toppings intact.
- → How can I tell if the cheesecake is done baking?
You'll know it's ready when the edges are firm, but the center still jiggles slightly (like a 2-3 inch wobbly spot). It'll set fully after cooling, so avoid baking too long to prevent dryness or cracks.